Old school metadata techniques evolve to help us with unlabeled photos
How do you deal with photos that come to you with no metadata? If you watched my videos on preparing (optimizing) images for the web, you may have noticed that I said that “I tried to make the demo images look halfway professional.” Most of them had embedded metadata, in other words. You may have cried foul. “None of my [insert adjective] clients ever send me pictures that are labeled in any way!” This post is a follow-up to Preparing Images for the Web in XnView, which can be seen here.
We can deal with that. We can slap on some metadata. To our optimizing for the web process, we’ll just add a step to apply the metadata that should have already been there. But we’ll only add seconds to the overall amount of time it takes. We’ll invest some think/plan/learn time now and the physical process will go by in a blink.
First, let’s understand that there’s metadata and there’s metadata. And that no grownup ever publishes a picture without any.
Huh?
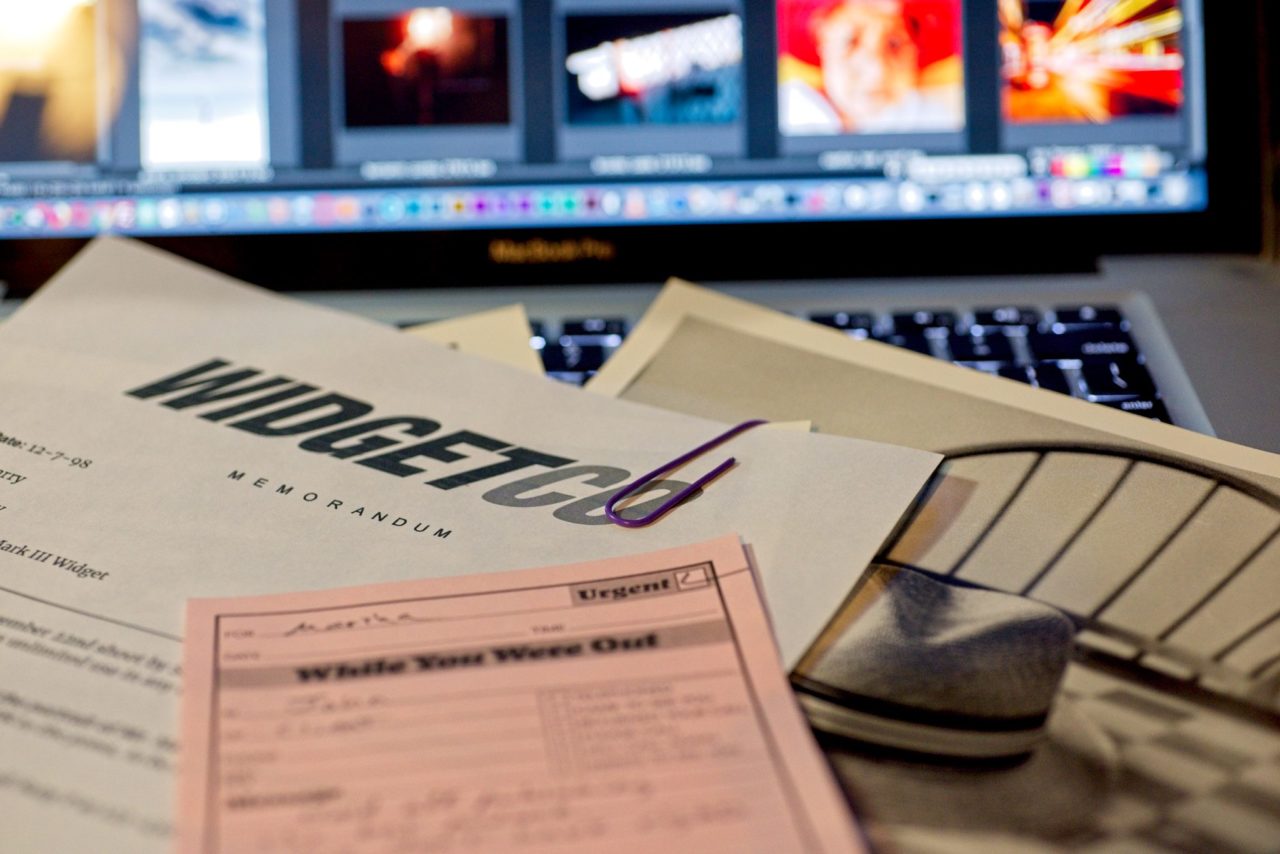
Hop in the DeLorean with me and we’ll reverse back to the twentieth century. Back in the day, pictures were physical objects, and we had some pretty elegant tools for dealing with metadata. Like the rubber stamp, the Post-It, and the most powerful of all, the plastic-coated paper clip.

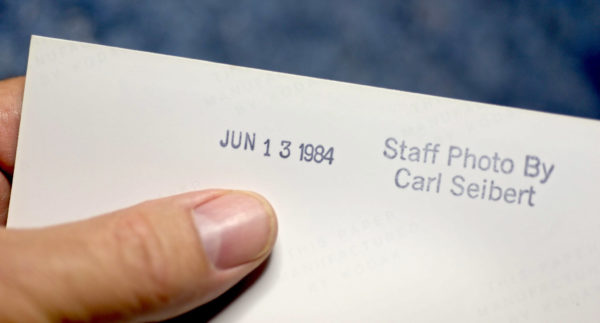
Some ante-millennial metadata was actually “embedded”. Very early on, some photographers would write their pre-DMCA copyright management information and minimal captions right on their negatives in India ink. (Or scratch it – yeeesh.) The information would appear right on the print, much like a modern-day watermark. Later, the (more civilized, in my opinion) practice was to write on the back of the print with a number two pencil. And/or use a rubber stamp.
In time, more detailed metadata came in the form of pieces of paper – delivery invoices, licenses, scribbled Post-Its, and good old corporate memos. These could be attached – literally – to a photo with that plastic coated paperclip! (The paperclip was plastic coated to prevent rust marks on the print.)
Nobody in his or her right mind would or could publish a photo without knowing who shot it, whether they had rights to it, and what was depicted in it.
Forward to now…
Back in the DeLorean, we park at the curb in front of the present and we still need to know what’s what with an image before we put it up on the web. The plastic-coated paperclip is no longer with us, though.
Nowadays, sometimes our images are annotated with proper information and sometimes we have to make do with emails, texts, and vaguely remembered phone calls for our metadata.
It’s best for our sanity and safety if the information we need about an asset is firmly attached to that asset. Today’s paperclip is cut-and-paste. And the back of the print has become embedded metadata.
It sounds like I may be advocating that if others have failed to already do so, we gather up the information about newly-acquired photos and paste it right onto the photo, in the caption.
I am suggesting exactly that.
But wouldn’t that be too much work? Nobody’s got time for that.
Ah, no.
We have to do it
It’s not too hard because it’s work we’ll have to do anyway. That’s the crux of it. We are going to have to gather up and vet the info that goes with the photo. We’re going to have to paste the stuff somewhere. We may as well paste it where it will do us the most good.
In an ideal situation, we would be evaluating the information that comes with a picture and making informed decisions. Now, we will be doing our evaluating while we tote the data from one place to another.
If we approach this in an organized way, we’ll have done with it and save back more time than we invested.
But first, before we get all HOW-TO here, let’s get something off our chests :
This is a drudge work chore that we generally shouldn’t have to do. So there. Feel free to resent having to do it. I won’t judge.
Professionals should mark up their own work with all the relevant information before they send it to us. That really isn’t too much to ask. And we should, politely, ask that they do just that. Taking those seconds to write down the rights info ensures that you have considered the matter.
But sometimes, we’re not dealing with professionals. Sometimes we’re dealing with ordinary people who quite literally are doing us a favor. Sometimes we’re dealing with people who just don’t know better. Sometimes, we’re dealing with lazy jerks we’d like to strangle.
If you’re a designer, editor, or photo curator, feral photos will usually come in from the wild accompanied by some sort of origin story, from which you are to devine whether you have rights to publish them and what, exactly, is depicted in them. With any luck, all this lore is contained in one place. But it might well be scattered about in multiple emails, Slack conversations, and in-person conversations. The idea is to gather it all up, sort it out, and paperclip it to the picture.

A picture arrives – without metadata
Let’s say we find ourselves looking at our new photo(s) at the beginning of the workflow described in my post on preparing photos for the web. This should be more or less the moment the photos arrive. Everything is still fresh in mind. The emails are still near the top of the inbox.
If the photo has no metadata at all, first we apply a suitable boilerplate template.
This template could have some basic information about your company or your website. It could have some keywords or static information about the topic at hand that might help you find the picture in your own files. It can be pretty minimal.
You usually don’t really know a darn thing about the copyright of such a picture, but you could add a generic warning in the copyright notice field. It could say that the image is indeed protected by copyright. Maybe you can suggest that honest people who encounter the picture one day could contact you and that you might be able to help them find the copyright owner. That would be good for karma points and some serious gratitude from both the copyright owner and some honest would-be user of the picture. My sample starter template includes some great language based on the warning used by The New York Times.
Update:
Google Images now supports three copyright-related IPTC fields. So, it behooves us to fill those fields in.
One of them is the Copyright field. If we know for sure who the copyright owner is, well, we should take the time to put their name in. If not, a templated generic statement like the one I just described above will do. Take a look at this post and this one for a detailed look at what’s happening.
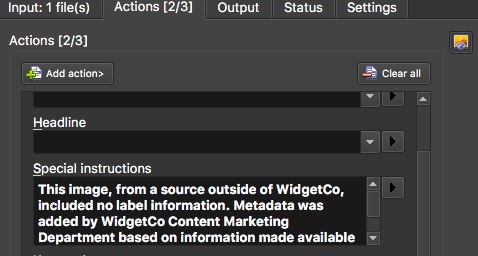
You could put a statement in the Special Instructions field that explains some background, or an embargo, or whatever might pertain to your situation. Maybe something like: “This photo was contributed to WidgetCo by a user of our customer forum”, or “These are photos from the Engineering archives.” If information like this will help in some way, say it in a template so you don’t have to fuss with typing it time after time.
If you credit pictures a certain way, like “..Courtesy of….”, go ahead and include that in the template’s Caption field so you don’t have to type it over and over.
Applying the template takes a couple seconds

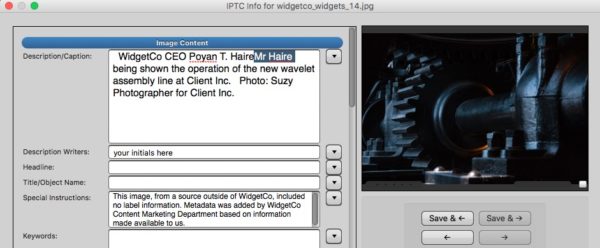
In XnView, “CMD/CTL + I” opens the IPTC editor. Choose a template from the “Load template…” button. If you have more than one image selected, you can opt to apply the template to all of them.

In Photo Mechanic, the “I” key opens the IPTC editor. Click the Snapshot button (lightning bolt) and choose a template. For multiple files, do the same thing in the Stationery Pad and click “Apply to selected”.
Pro tip: In Photo Mechanic, once a template is loaded in the Stationery Pad, you can apply it without opening the Stationery Pad. Just right-click and choose “Apply IPTC Stationery”.
Click here for a sample handout images template. Delete the ideas that don’t work for you and customize to taste the ones that do. Simple is best.
For example
Now we need to create specific metadata for the photo in front of us.
Hopefully, you’ve still got the email open. And hopefully, cross fingers, all the information we need will be in that one email. Generally, it will look something like this:
To: james@widgetco.com
Subject: photo
____________________________________________________________________________
Hi James,
Here is the photo for your blog post on your CEO’s visit to our factory.
The photo shows Mr Haire being shown the operation of the new wavelet assembly line at Client Inc.
Photo should be credited to Suzy Photographer for Client Inc.
The client says that Suzy granted them rights that cover your use of the photo.
Best to the family.
-Sally
Sally Somebody, Account Executive
Awesome PR
123-456-7890
We’ll grab the line that is more or less a caption and paste it into the caption field. I like to confine my work on metadata-less handouts to the caption, simply because scrolling from field to field, pasting this here and that there consumes seconds I’d rather spend doing something else. Anything else, really.
Update: Well, Google just popped that balloon for me. Scroll we must. Read on.
Your situation may dictate otherwise. If you are distributing the image to customers, as a PR agency might, you’ll want to put a fine level of professional polish on your metadata because it’s part of your product. If your digital asset manager says you have to populate certain fields for DAM purposes, well, you gotta.

When you paste down that caption information, take a quick editorial look. Nothing fancy at this stage. In this case, we should edit a little to make it “WidgetCo CEO Poyan T. Haire is shown….” We should have his full name in the metadata. We’ll have to type it in anyway when we put the image on the page, so we might as well take care of that now.
By the same logic – if we know exactly how we will use the image – we could go fancy and go ahead and edit the caption to something page-ready, like “WidgetCo CEO Poyan T. Haire watches a demonstration of Client Inc’s new wavelet assembly line.” (Or maybe the rookie flub “…is shown…” just made your skin crawl and you felt you had to…)
Proofread while you copy/paste
Either way, take a moment to confirm that all the information we’ll need to publish is present and accounted for.
If possible, we should never keystroke information like names. By all means, double check to make sure they’re correct early and often. But once confirmed, it’s best if data like that travels to the page automatically if possible, or by copy and paste if not.
Don’t over-invest at the front end of your workflow. If you’re not sure how the caption will look on the page, you could end up writing it twice. Getting the CEO’s full name in there serves a purpose one way or the other, but writing the for-real caption at this stage of the game might be overdoing. Unless, of course, it helps in your campaign for a desk closer to the coffee machine.
Copy and paste the photographer’s byline into the appropriate place in the caption field of your template.
You could paste her name into the Creator field and “For Client Inc” into the Credit field, too, if that serves some purpose in your system. But I’ll be honest here. I did this task thousands of times a year in my last job. I never did that. The Creator field and Source field on my template both just said “Handout” and that was that.
But now we have to do the Google Images fields, right?
Update: Now that Google is supporting the Creator and Credit Line fields, we should surely use them, no matter that will add to the amount of time it will take to fix up a metadata-less image.
Here’s a tip that will keep you from having from having to type the photographer’s name and the credit twice, at least if you’re working in Photo Mechanic.
In the Caption field, use variables to make the byline, like so: “Photo by {byline} {credit}” (Without the quotes, and note that I used a double space instead of a slash or pipe so that I wouldn’t have a widow if there was no value in Credit Line).
Now, when you put the name in the Creator field, and the appropriate value in the Credit Line field, and then click “OK”, Photo Mechanic will populate the byline in the Caption field all by itself. You will still have to scroll up and down to access those fields, but you can minimize that hassle by customizing Photo Mechanic’s IPTC editor dialog to put the Caption, Creator, Credit, and Copyright fields all right next to each other.
in XnView, You can use “Insert from” from the flyout at the right of the caption field. It’s not as clever as Photo Mechanic’s variables, but it will save some clicking and cutting and pasting. You can’t build this function into a template. It has to be done live for every picture.
Metadata helps find assets
Think about how you store and retrieve assets. You may search for stuff with your operating system or in a utility like NeoFinder. You may use a desktop photo management application that functions as a digital asset management system, like Lightroom Classic or ON1 RAW. Or you may have a corporation-wide DAM with millions of assets in it. Regardless of the system, spend a second thinking about how you would search for this picture. Would what you’ve put in the metadata enable you to find it in your system? If the answer is yes, then you’re good to go.
Now we need to deal with the matter of rights.
We can copy the line from the email that says, “The client says that Suzy granted them rights that cover your use of the photo”, and add “sally from awesome PR says” to it. And we’re good. Probably.
If we put a note about rights at the end of the caption, it will appear along with the rest of the caption, right on the page when we place the picture. (Automatically if your website or publishing system works that way. If it doesn’t, you’ll have to copy and paste, in which case you don’t need to worry about the next twelve paragraphs or so.)
Then we just delete the stuff we don’t need when we edit the caption on the page.
But wait!
Many times, I’ve written in this blog that there are conflicting goals for the caption field.
On the one hand, everything we absolutely, positively need to communicate to the future about our picture needs to be in the caption in some form or another, because it may be the only bit of metadata that a future user actually sees. On the other hand, anything we put in the caption might one day end up being published. Not on purpose, necessarily. But it could happen.
Do we want our internal communications visible to the whole world? Do we want to dox Sally at awesome PR? Probably not. What should we do? (Go here to watch a recorded webinar that is a great primer on copyright for marketers and website operators generally. )
First, we take a deep breath. This isn’t as scary as it sounds. Nowadays we all tend to overreact to worries about privacy. B-r-e-a-t-h-e.
We don’t want to dox anybody, and we don’t want to give away trade secrets. But we do know that having that license information attached to the picture might save our butt big time later on.
Sally at Awesome did, in fact, say that Client Inc said that Suzy sold them a license that allows WidgetCo to use the picture. (We sure hope she’s correct!). That’s not exactly the recipe for Coke. It’s not going to ruin anybody’s life or crash the stock price if that information comes to light. But it might sound unprofessional if we accidentally published a casual-sounding note about it.
So, we have options
Option One is we just make sure the information is unambiguous and stated in a professional manner. We don’t dox Sally, we don’t make any snide jokes, and we use semi-decent grammar. “Awesome PR states that Client Inc’s license for this photo covers WidgetCo’s use of it.”
Option Two is just like Option One, but we take it up a notch and reference an external document that holds our rights info. We can say something like “Contract linked in the DAM” (remember to actually link it!), or See “Suzy Photographer 7-6-2009” in Legal’s files”. It’s high-tech paperclipping.
Option Three is make up a code to describe the rights situation and put that right into the metadata.
You know the unobtrusive string of characters on the bottom of your toaster that records the manufacture date? Like that. I used a system like this once and it worked great.
We could, for example, use characters to indicate whether we actually possess the license, who was responsible for obtaining the image, who gave us the picture or told us the license exists, and characterize the license itself. Is it one-time? Royalty-free? Is your use included in somebody else’s license? Keep the code simple enough that you can jot it down in two or three seconds. (And make a reference chart no bigger than a Postit.)
For our example, we could have something like “0-JA-SS-3” (We don’t possess the license. James is the responsible party. He got the picture from Sally. And we’re covered by somebody else’s license.) That could go anywhere in our metadata without offending anybody.
Work in as few fields as possible
The Source field is made for stuff like this, but we can – and probably should – put it right at the end of the caption. That fits the three-second requirement and it puts the information right in front of the designer when the time comes. Later, we just read it and delete it.
(Workflow pro tip: Taking those seconds to write down the rights info ensures that you have considered the matter. Which is really the important thing.)
If we put our rights code in the Source field, or Special Instructions field or Rights Usage Terms field, we’ll minimize the chances of accidentally publishing it. But we’ll also minimize the chance that our designer will see it. Decisions. Decisions.
If the idea of codifying rights information really interests you, Check out the PLUS project, which is a sophisticated application of this simple idea.
Let’s remember that we’re not just writing for our own purposes. We may be writing for some random person who one day finds our picture in a Google search. Let’s avoid saying anything that a person like that might misinterpret, like “This picture is OK to use.” That could work out badly.
Now here’s a really important point
If our website puts captions from metadata right on the page, and we edit a caption on the page, our edits only apply to what shows up on our website. They ARE NOT written back to the photo. If we put a trade secret in our metadata, it will go out into the world on our picture, regardless of how our published caption looks! That’s not actually a scary thing. Don’t panic. Just don’t put trade secrets in embedded metadata.
I’ll say it again. Editing a caption on a webpage DOES NOT change the contents of metadata on a picture.
What if
What if a picture has just some metadata? Sometimes, for instance, we see pictures that have a Creator and a Copyright Notice, and no other useful metadata.
In that case, our options vary, depending on what software we are using.

In Photo Mechanic, we can apply our template with the Stationery Pad, being careful to turn off any fields that we don’t want to overwrite.
Instead of using the IPTC editor to apply the template, select the photo in the contact sheet, call the Stationery Pad, click on the Snapshot button and choose the right template and click “Apply to Selected” (Just make sure the tickboxes by the fields you want to preserve are un-ticked.)
Pro tip: You can make a special template (Snapshot) for this purpose that leaves the Creator and Copyright fields blank and not activated. Just call that template when needed and you don’t have to mess with tickboxes.
Alternative pro tip: Blank fields in a Photo Mechanic XMP template file will skip over, rather than clear, existing data. Thus you can create an XMP file containing, say, only a disclaimer in the Special Instructions, and load it right on top of existing metadata. Your disclaimer will overwrite anything in Special Instructions, but otherwise, any existing metadata will be preserved. This amounts to the same thing as the tip above, but the XMP files can be shared with others.

In XnView, you could make a Batch Convert action that applies a template that spares certain fields. In XnView’s IPTC editor, an empty field destroys any data existing in that field when it’s applied. (Just like Photo Mechanic’s.) But in Batch Convert, it’s the opposite. An empty field will be skipped over. It’s a bit more trouble than the Photo Mechanic’s Stationery Pad, but it gets the job done.
Alternatively, you can just paste and/or write in whatever fields you need to.
It’s easy, just not fun
By now you may be thinking that this is way too much work and thought.
In the sense that it’s grunge work that probably should have been done by somebody else, you’re right.
But, while we are adding a drudgery step to the process of optimizing images for the web, we’re also doing some of the important parts of the work at the same time.
Remember from my last post that most of the real work in preparing pictures is the professional judgment stuff. Does the caption adequately identify the people in the picture? Check. You just pasted it together. Does the combination of what you know about the photographer, the rights, and the source of the image fit together in a trustworthy way? Check. You just gathered all that information, so you should know. We’ve combined steps here.
On average, you should find that dealing with an image that arrives without metadata will take half a minute to a minute or so longer than dealing with a properly labeled one. Two minutes means you’ve got a kink in your workflow that needs to be ironed out.
It’s worth it
Later, when you reach the point of actually putting the picture on a page or searching for it to reuse, if every fifth or sixth time at bat you save yourself from having to find a Post-It, or dig through or emails, or open 26 folders hunting for a file, you will save much more time than you invested up front.
Of course, there will be the occasional case where you’ll spend a half hour chasing around about rights or correcting the name of that industrial process. But that’s not busy work. That’s self-defense.
Yeah, it’s a pain. But we’re turning risk into value. That’s a good thing, business-wise. What do you think? The comments section awaits.
