New camera adds content authenticity metadata to photos, helping in the fight against disinformation. A content credential proves your picture is real. You probably want that. We look at how it works and what it means.
The principal of Carl Seibert Solutions and the owner of this site, Carl Seibert has become a metadata crusader. From clients who need to bring order to their assets collections, to website owners, to Creative Commons activists, the digital world needs to take advantage of better metadata. Carl has made it a mission to spread the [meta]word.
New camera adds content authenticity metadata to photos, helping in the fight against disinformation. A content credential proves your picture is real. You probably want that. We look at how it works and what it means.
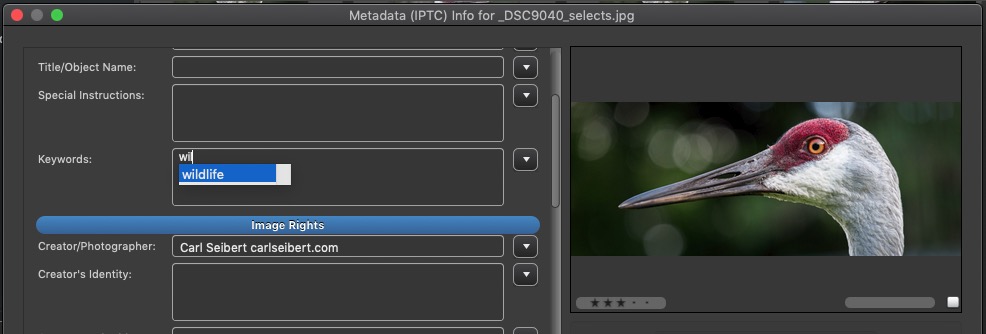
Enter controlled vocabulary terms with just a few keystrokes in any Photo Mechanic field that has a flyout menu
In Photo Mechanic and Photo Mechanic Plus, you can use the Autocomplete type-ahead feature to enable a controlled vocabulary right in your Keywords field.
In my last post, I entered a keyword for the name of my cat Donut by typing just three characters - “Don[enter]”.

Take a second glance at your caption and keywords to do a better job of anticipating search queries. The Keywords field is just waiting to serve you by - among other things - providing a place for potential search terms that didn’t make it into your caption.

For most US-based photographers, Sunday, November 1 marked the time to readjust camera clocks at the end of Daylight Saving Time. In most of Europe, the fateful date was last Sunday, October 25. And in most of Asia, countries don’t take part in the twice-yearly festival of clock-changing.
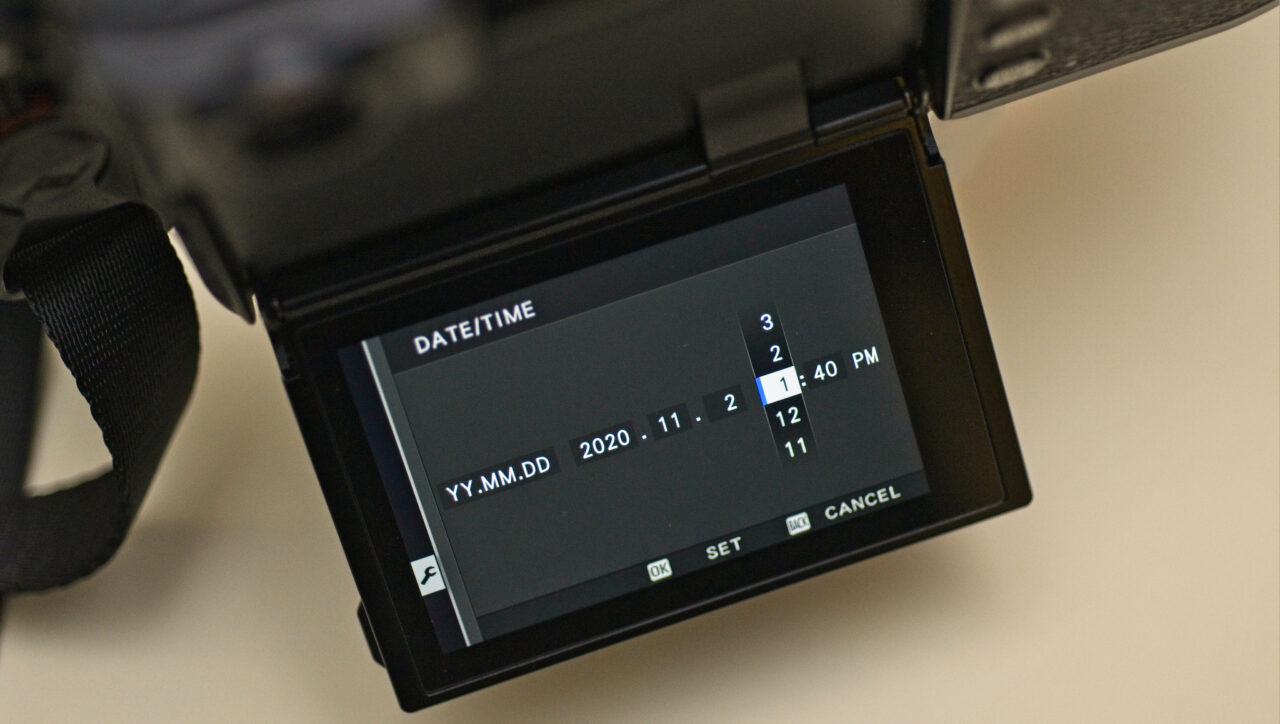
But whether your country does or doesn’t have Daylight Saving Time, it’s a good time to take a look at the date and time settings in all your cameras to make sure everything is on the up and up.
Camera clocks aren’t the greatest timekeepers. I was tempted to compare them unfavorably to Swiss chronometers, but hey, even chronometer-certified timepieces drift over half a year’s time.
My cameras were all a little fast this time, but only by a couple minutes or so. We’ve come a long way from the early digital era, when camera clocks could be super wildly off. But still.
Most of us – and I’m speaking for myself here – never so much as notice whether the times in our Exif metadata are tracking with reality or not. I set Photo Mechanic to set the IPTC Create Date time to the Exif capture time in my files and that’s that. Heck, I don’t even check to make sure the setting hasn’t been bumped in the last, well, since the last time I did one of these posts.
How fine a point you want to put on timekeeping varies with what you shoot, how your workflow is structured, and how you find images in your collection.
At one end of the spectrum, some time last Thursday is close enough. At the other, you might want frames shot on different cameras to sort in minute-by-minute chronological order. If you’re in the latter group, some camera manufacturers offer software that will let you perfectly synchronize cameras. (Sometimes for free and sometimes at fairly outrageous prices, I might add.) Or, if you use Photo Mechanic, you could use the method I describe in this post.
So there you have it. Check those camera clocks. Check the metadata on a picture to make sure the IPTC time and the Exif time are as you want them to be. Then there will be one little annoyance not to worry about for another half a year or so.
Hey. While you’re at it, check those batteries on your smoke detectors, computer UPSes and security gizmos around the house. It couldn’t hurt. Stay safe out there.
Camera Bits has released Photo Mechanic Plus, the company’s new digital asset management product for photographers. Photo Mechanic Plus combines a full-featured instance of Photo Mechanic 6 with new photo cataloging capabilities.
Photographers have very different digital asset management needs than the usual customers of DAM systems, like marketing departments, for example.
The IPTC announced today that Google’s new Licensable feature is now live on Google Images. The new feature allows photographers to trigger a badge that identifies photos as “Licensable” by filling in the correct fields in their photo’s IPTC metadata.
I reported that the new feature was coming, here, in February. An update on Photo Mechanic adding support for Licensable can be found here. Several videos on my YouTube channel describe preparing images for Licensable in various photo editing software. See this playlist on MetadataMatters.blog/youtube
The feature has been in beta since then. Google had announced an intent to make the feature live by “summer 2020” but it pushed the date back at least once. Given that the search company has had to contend with the coronavirus pandemic, civil unrest and an election under threat of foreign interference in the US, I think Google did pretty well rolling out the feature with three weeks of summer left.
The Licensable badge appears on thumbnails as a small icon that looks like it represents a photo of mountains. It resembles the one that indicated focus at infinity on generations of point-and-shoot film cameras. Recently posted pictures’ badges have a time element, like “1 day ago”. If you hover your mouse over the thumbnail, the icon pops out to say “Licensable” and looks like the badge as we’ve seen it in Google’s handout picture.
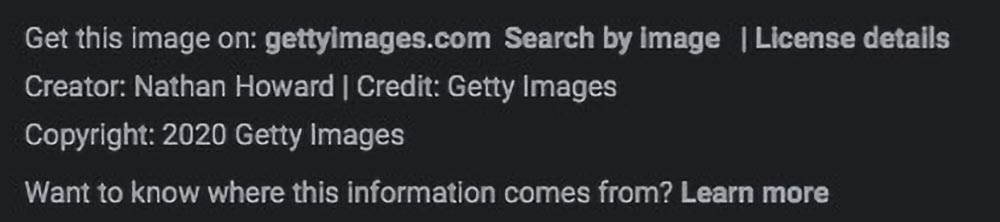
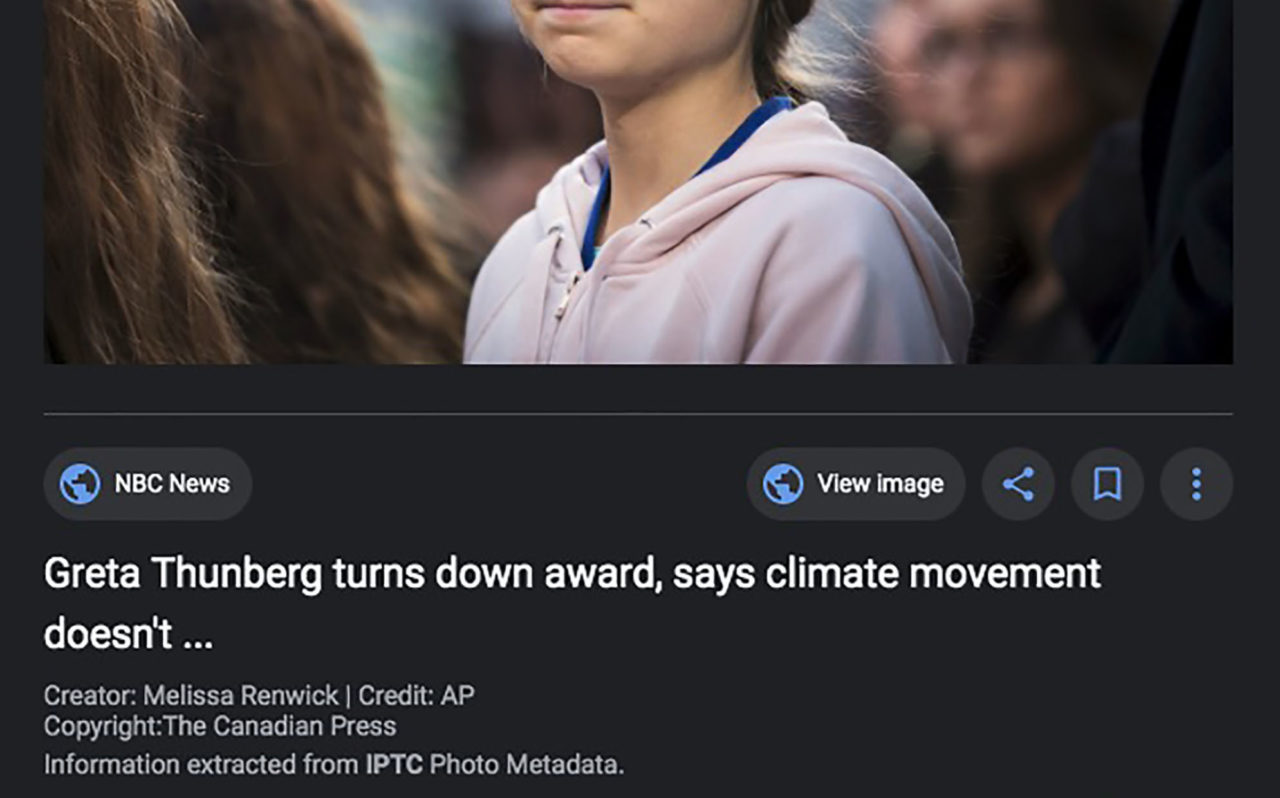
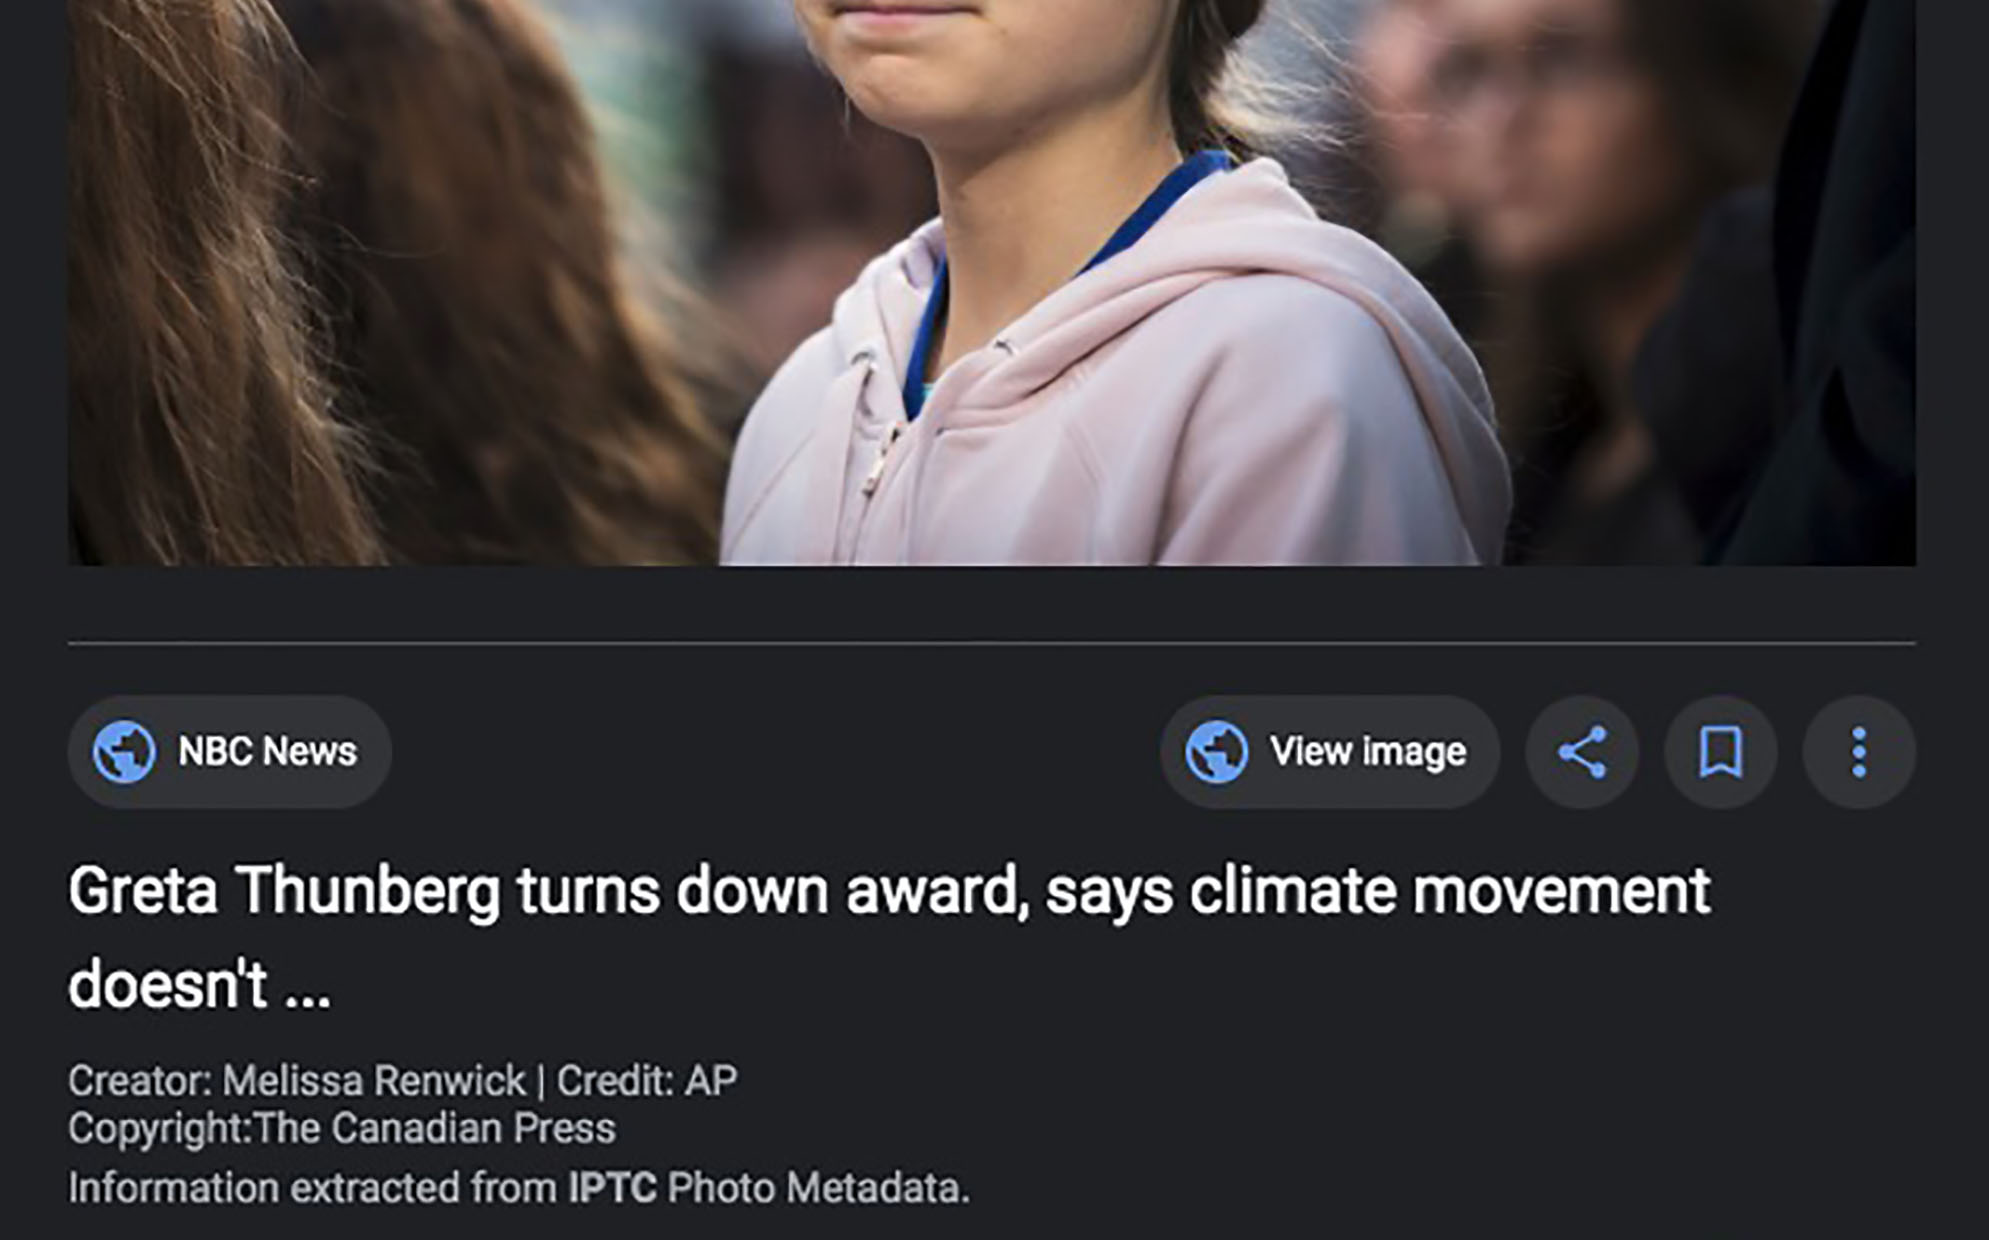
On the image preview, if a Licensor URL has been specified in that IPTC Extended specification field, a link for “Get this image on:” appears above the image’s Creator field. “Get this image on:” uses the domain name from the link for text. The link clicks through to whatever URL is specified in Licensor URL.
If the Copyright URL/Web Statement of rights field is filled, a “License details” link appears to the right of “Get this image on:”. “License details” clicks through, as would be expected, to the page specified in Copyright URL.
Watch the video version of this post
There is another link in this row that goes to a search-by-image search for the displayed image.
Fields that don’t have values aren’t displayed. So, for example, if there’s no value in Licensor URL, no “Get this image on:” link appears. Likewise, the Creator, Credit, and Copyright fields behave the same way.
(Tip: Use the pulldown on a Google Images returns page that allows you to filter by license type. Filter by “Commercial and other license types” to see a page full of Licensable badges.)
On the first day, most of the Licensable badged images I found appear to be from Getty Images. That’s no surprise, as Getty Images has worked with the IPTC on the development of Google’s support for metadata.
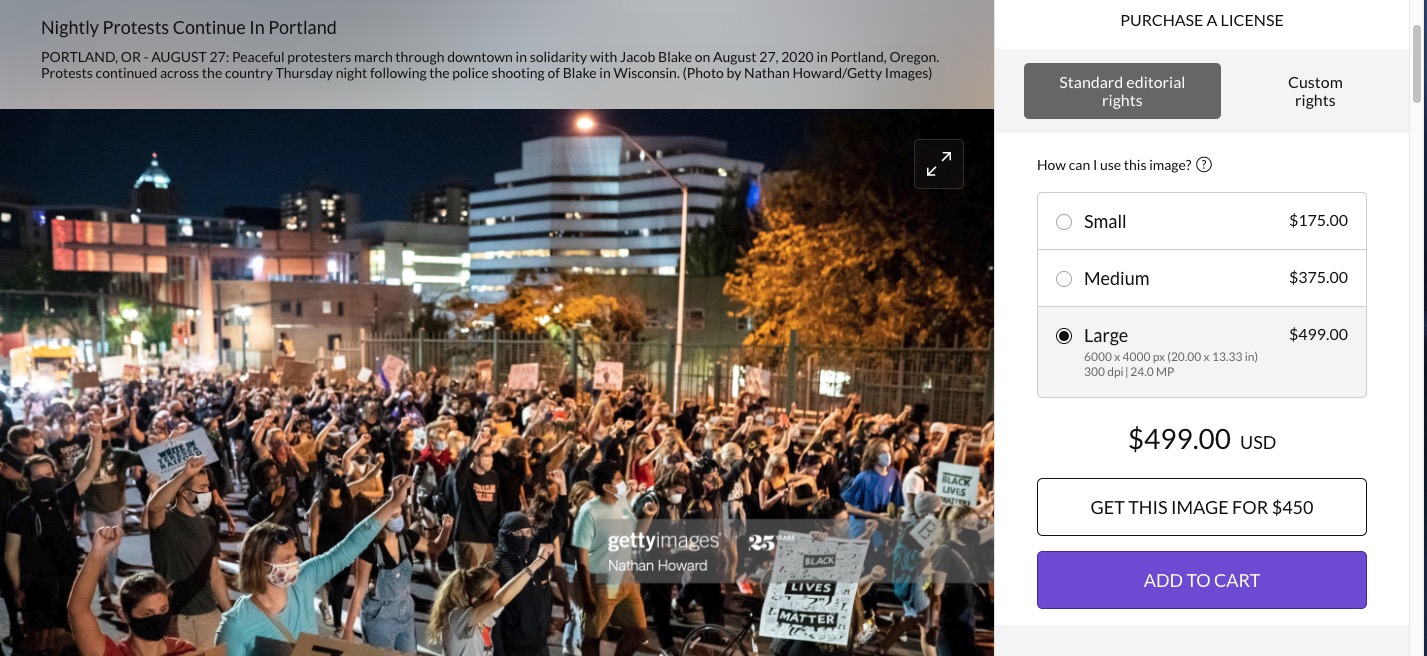
All the Getty pictures I examined had Licensor URLs that took visitors straight to Getty’s e-commerce page for that particular picture. I did not find any images with a value in the Licensor Name field, from Getty or anybody else. My impression from the early documentation was that a value in this field would be used as the label for the “Get this image on:” link. Since I didn’t find an example, I can’t yet report on whether or not that is true. My advice is still to put a value in that field. It can’t hurt.
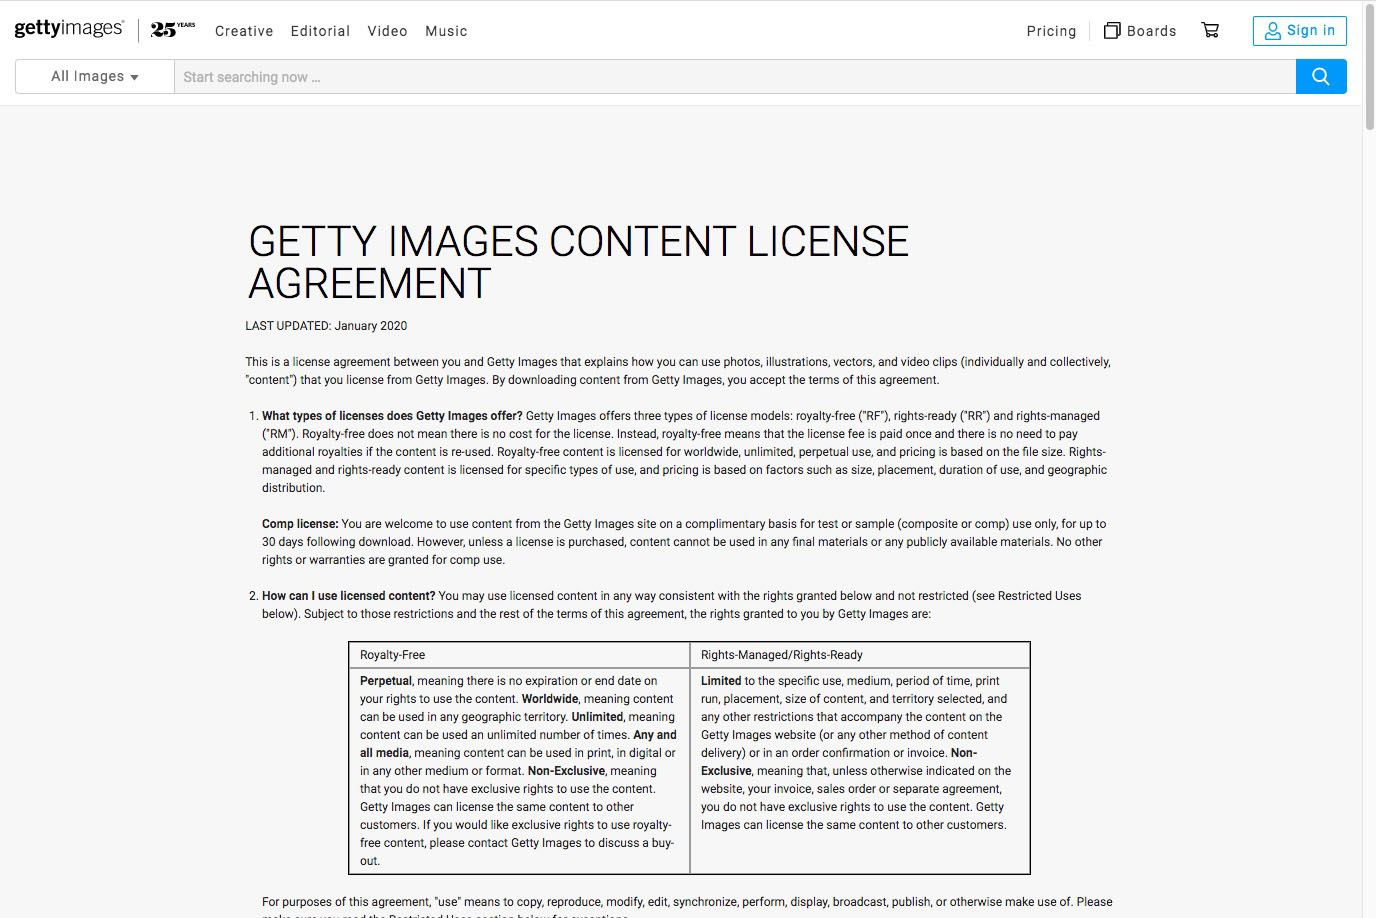
Getty Images’ Copyright URL points to a generic “Getty Images Content License Agreement” page on gettyimages.com. Not even Getty Images knows in advance exactly what license might be under discussion for a particular image. I found images from independent photographers where the URL in Copyright URL points to their homepage. I still advise pointing visitors/prospective customers to a landing page on your site that tells prospective licensees that they can contact you about licensing. Clearly, anything that puts the visitor in touch with the photographer works.

A Google Images search for “portland” (Portland Oregon is in the news today) returned a photo from Portland, Maine, by Michael Eric Berube, of Maine Virtual Home Tours.
Berube had not yet heard of the Licensable feature. He didn’t feel it would be of direct benefit to a real estate photographer, but thought it would help others. “So, if I were a stock photographer, that would come in super handy”, he said. “I’m glad Google stepped up to do that”, he added.
He programs his cameras to record copyright information in Exif metadata. When he exports his RAW image files from Lightroom, it writes the information to the exported files’ IPTC metadata. His Copyright URL points to his homepage.

Berube includes brief contact information in his Copyright field, which reads, “(c) Michael Eric Berube, MaineVirtualHomeTours.com” on the Google Images preview page. Note that the contents of the Copyright field appear only as text. A URL in this field should not include “https://www….”. I have long recommended including a simple URL or phone number in the copyright field.
The new Google features can only work when websites preserve embedded metadata on images. While we see some encouraging momentum in the numbers of sites that do honor metadata, there is a lot of work to be done on that score. I’ve written many posts here on making sure that your website properly preserves metadata. Here is a recent example that includes step-by-step instructions on how to check to be sure your site is working properly.
The Licensable badge can also be invoked by using structured markup on a webpage, rather than embedded metadata. I did see some examples on Google Images of that being done. But I don’t think that technique is relevant for most photographers. And I stress that it’s not a substitute for proper metadata on images.
I found impressive the number of Licensable badges I found so soon. This is another banner day for photographers in a time when good news is hard to come by.
Are you marking up your images to be Licensable friendly? How is it working out for you? Jump in the comments and let us know.
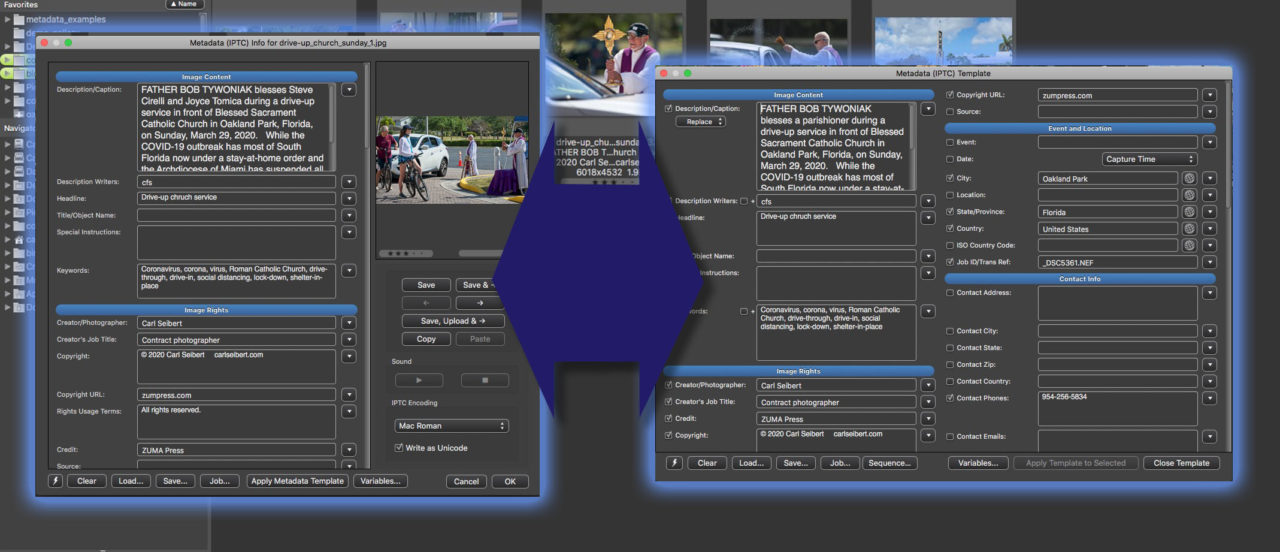

Photo Mechanic has two, count ‘en two, big fancy metadata editor dialogs – Metadata (IPTC) Info and Metadata (IPTC) Template. What’s the difference? When should we use one or the other? Let’s look at both editors in some depth to see when – and how – to use each.
Photo Mechanic used to call the Metadata (IPTC) Template dialog the “Stationery Pad”. “Stationery Pad” may not have been the best ever name. Users wondered what it heck it was. With the release of Photo Mechanic 6, the name was changed. “Metadata (IPTC) Template” may not be exactly an ideal name, either. While it sounds clear enough, it’s not really terribly descriptive. It’s not the only way to edit templates. And it is the way to do a whole bunch of other stuff.
Now, you can live a happy life using only Metadata (IPTC) Info. I did. For years. (Let’s call it here the “IPTC Editor”.)
For a deep dive, try the video version of this post:
So, let’s take a look at it first. Then, we can look at Metadata (IPTC) Template to understand the differences. (We’ll call that one the “Template Editor”)
The top-line differences between the editors are pretty straight-forward. IPTC Info can read metadata from a picture. Metadata Template can’t (directly). The template editor can easily broadcast metadata to multiple images, while the IPTC editor can’t.
If we have just created an image, let’s say we edited in Photoshop and did a save-as, and we want to caption it, the IPTC Editor provides a pretty straightforward workflow.
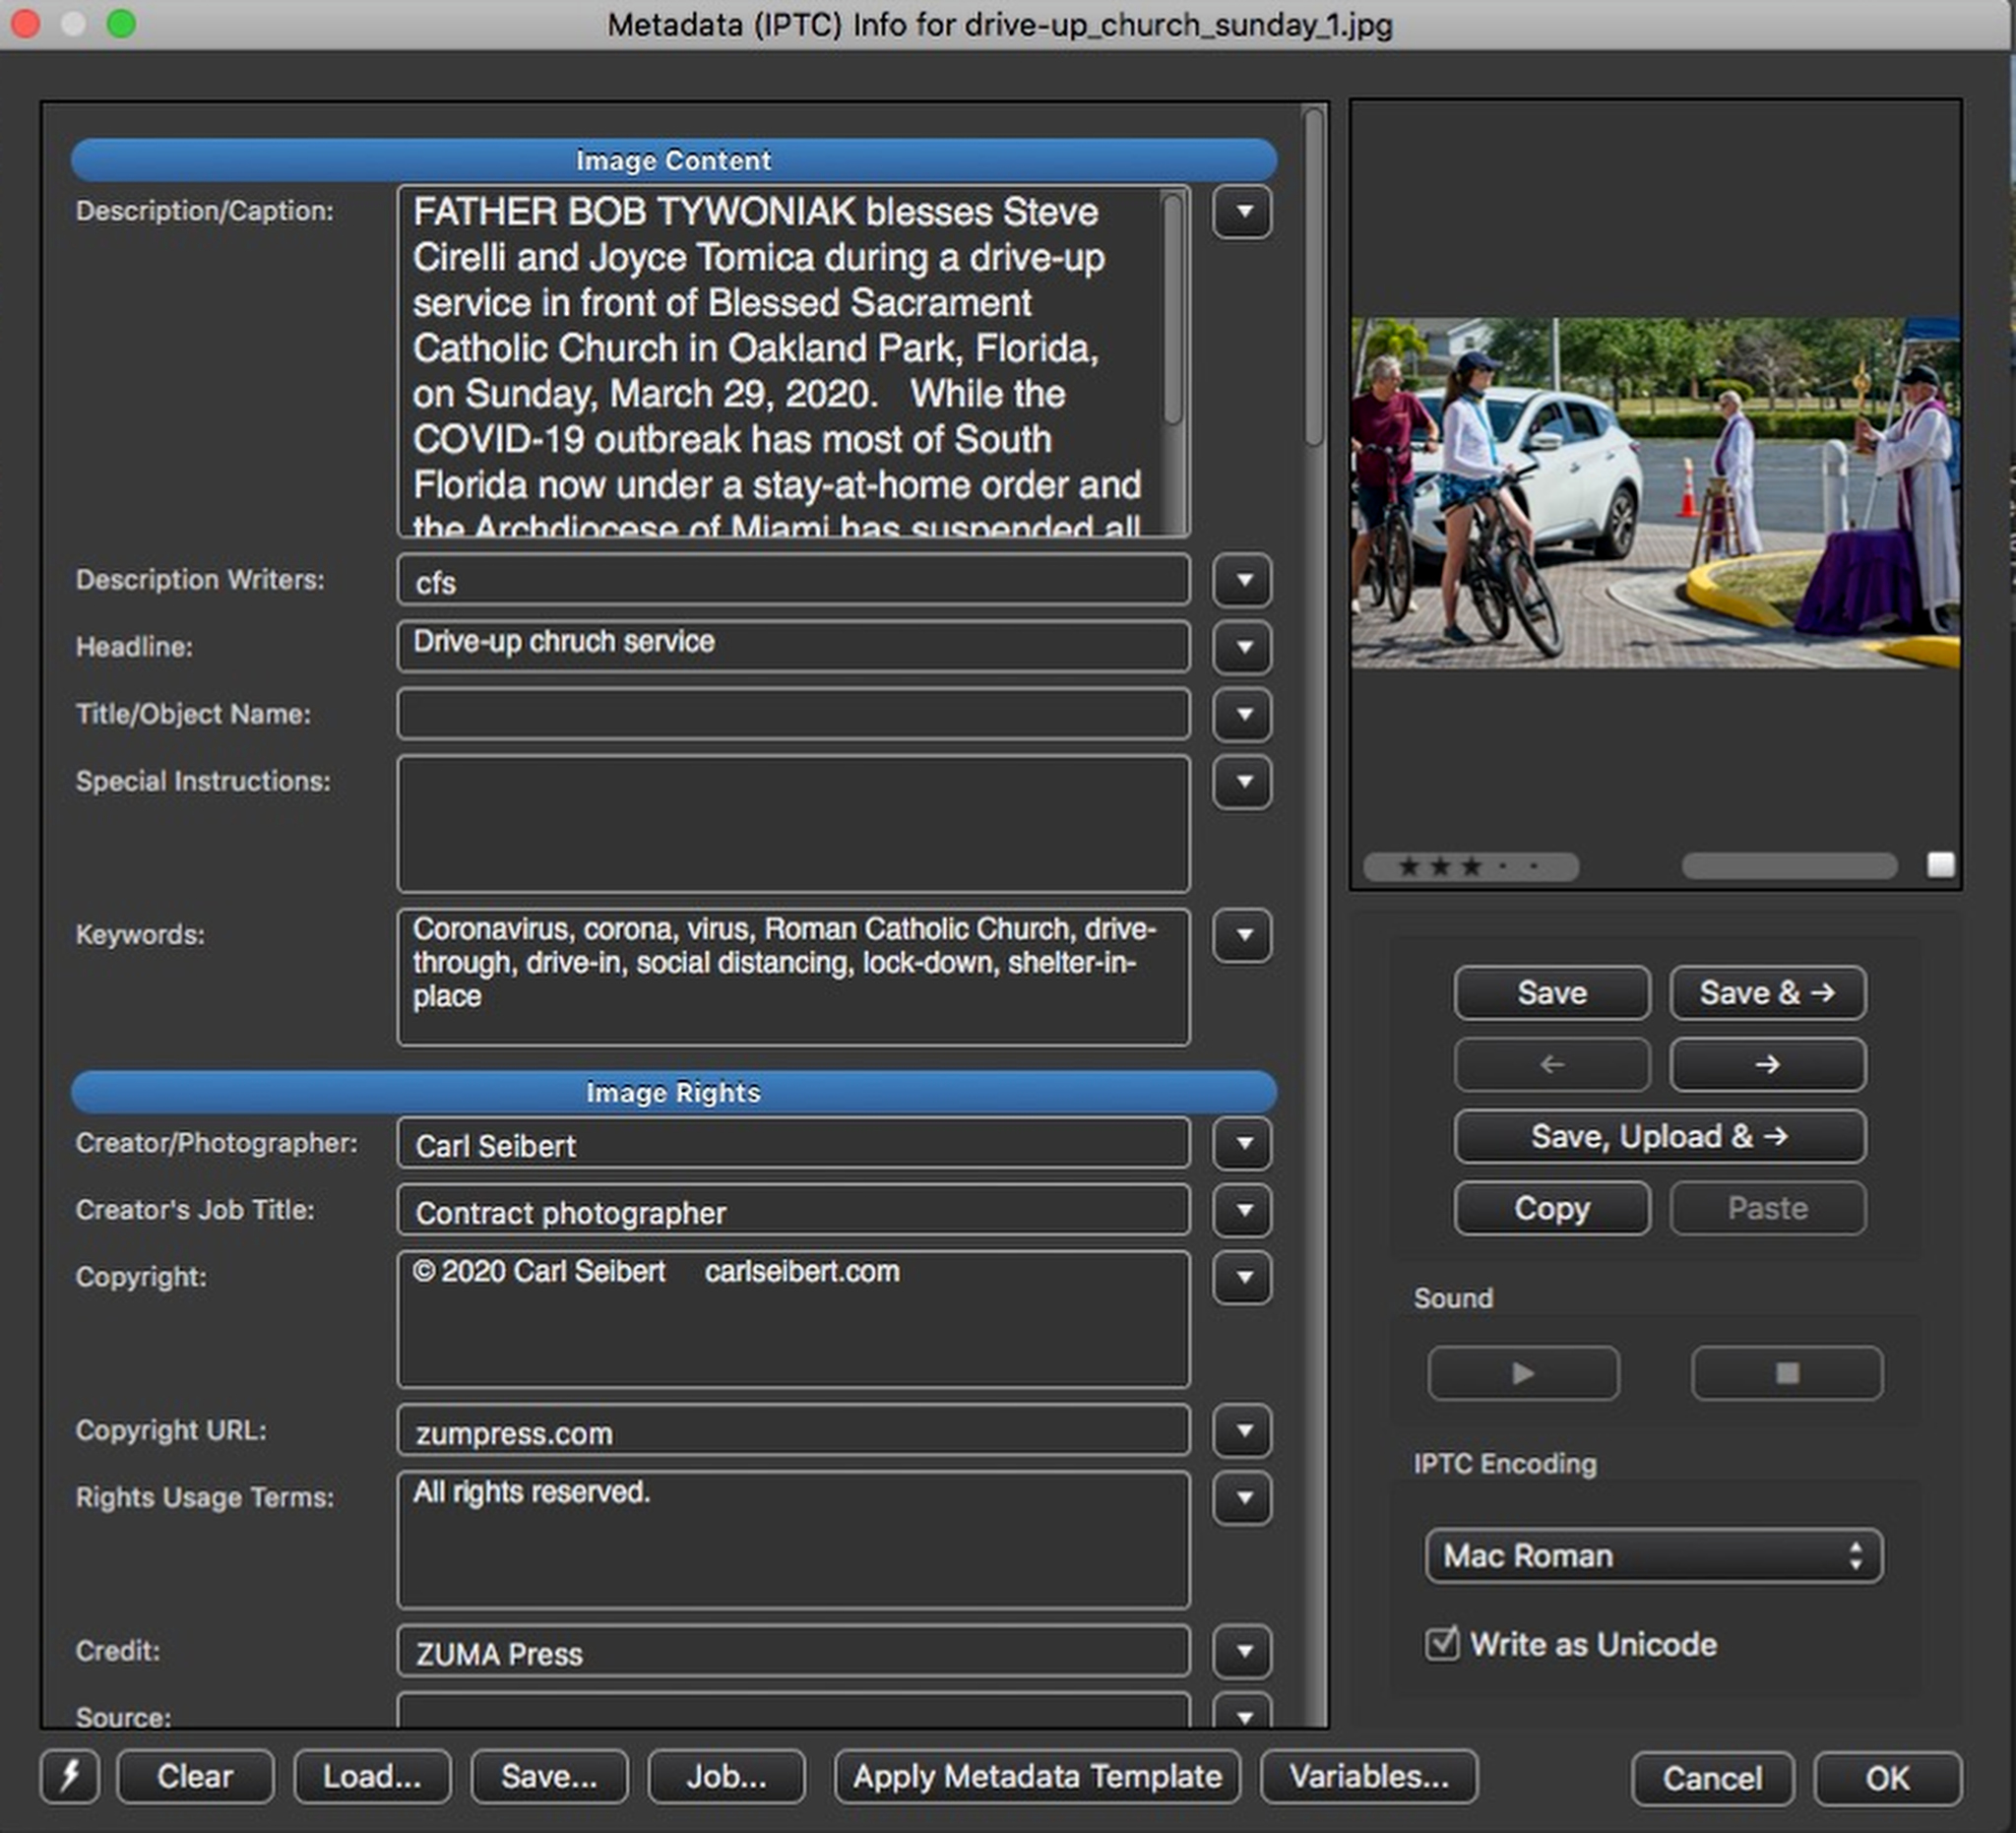
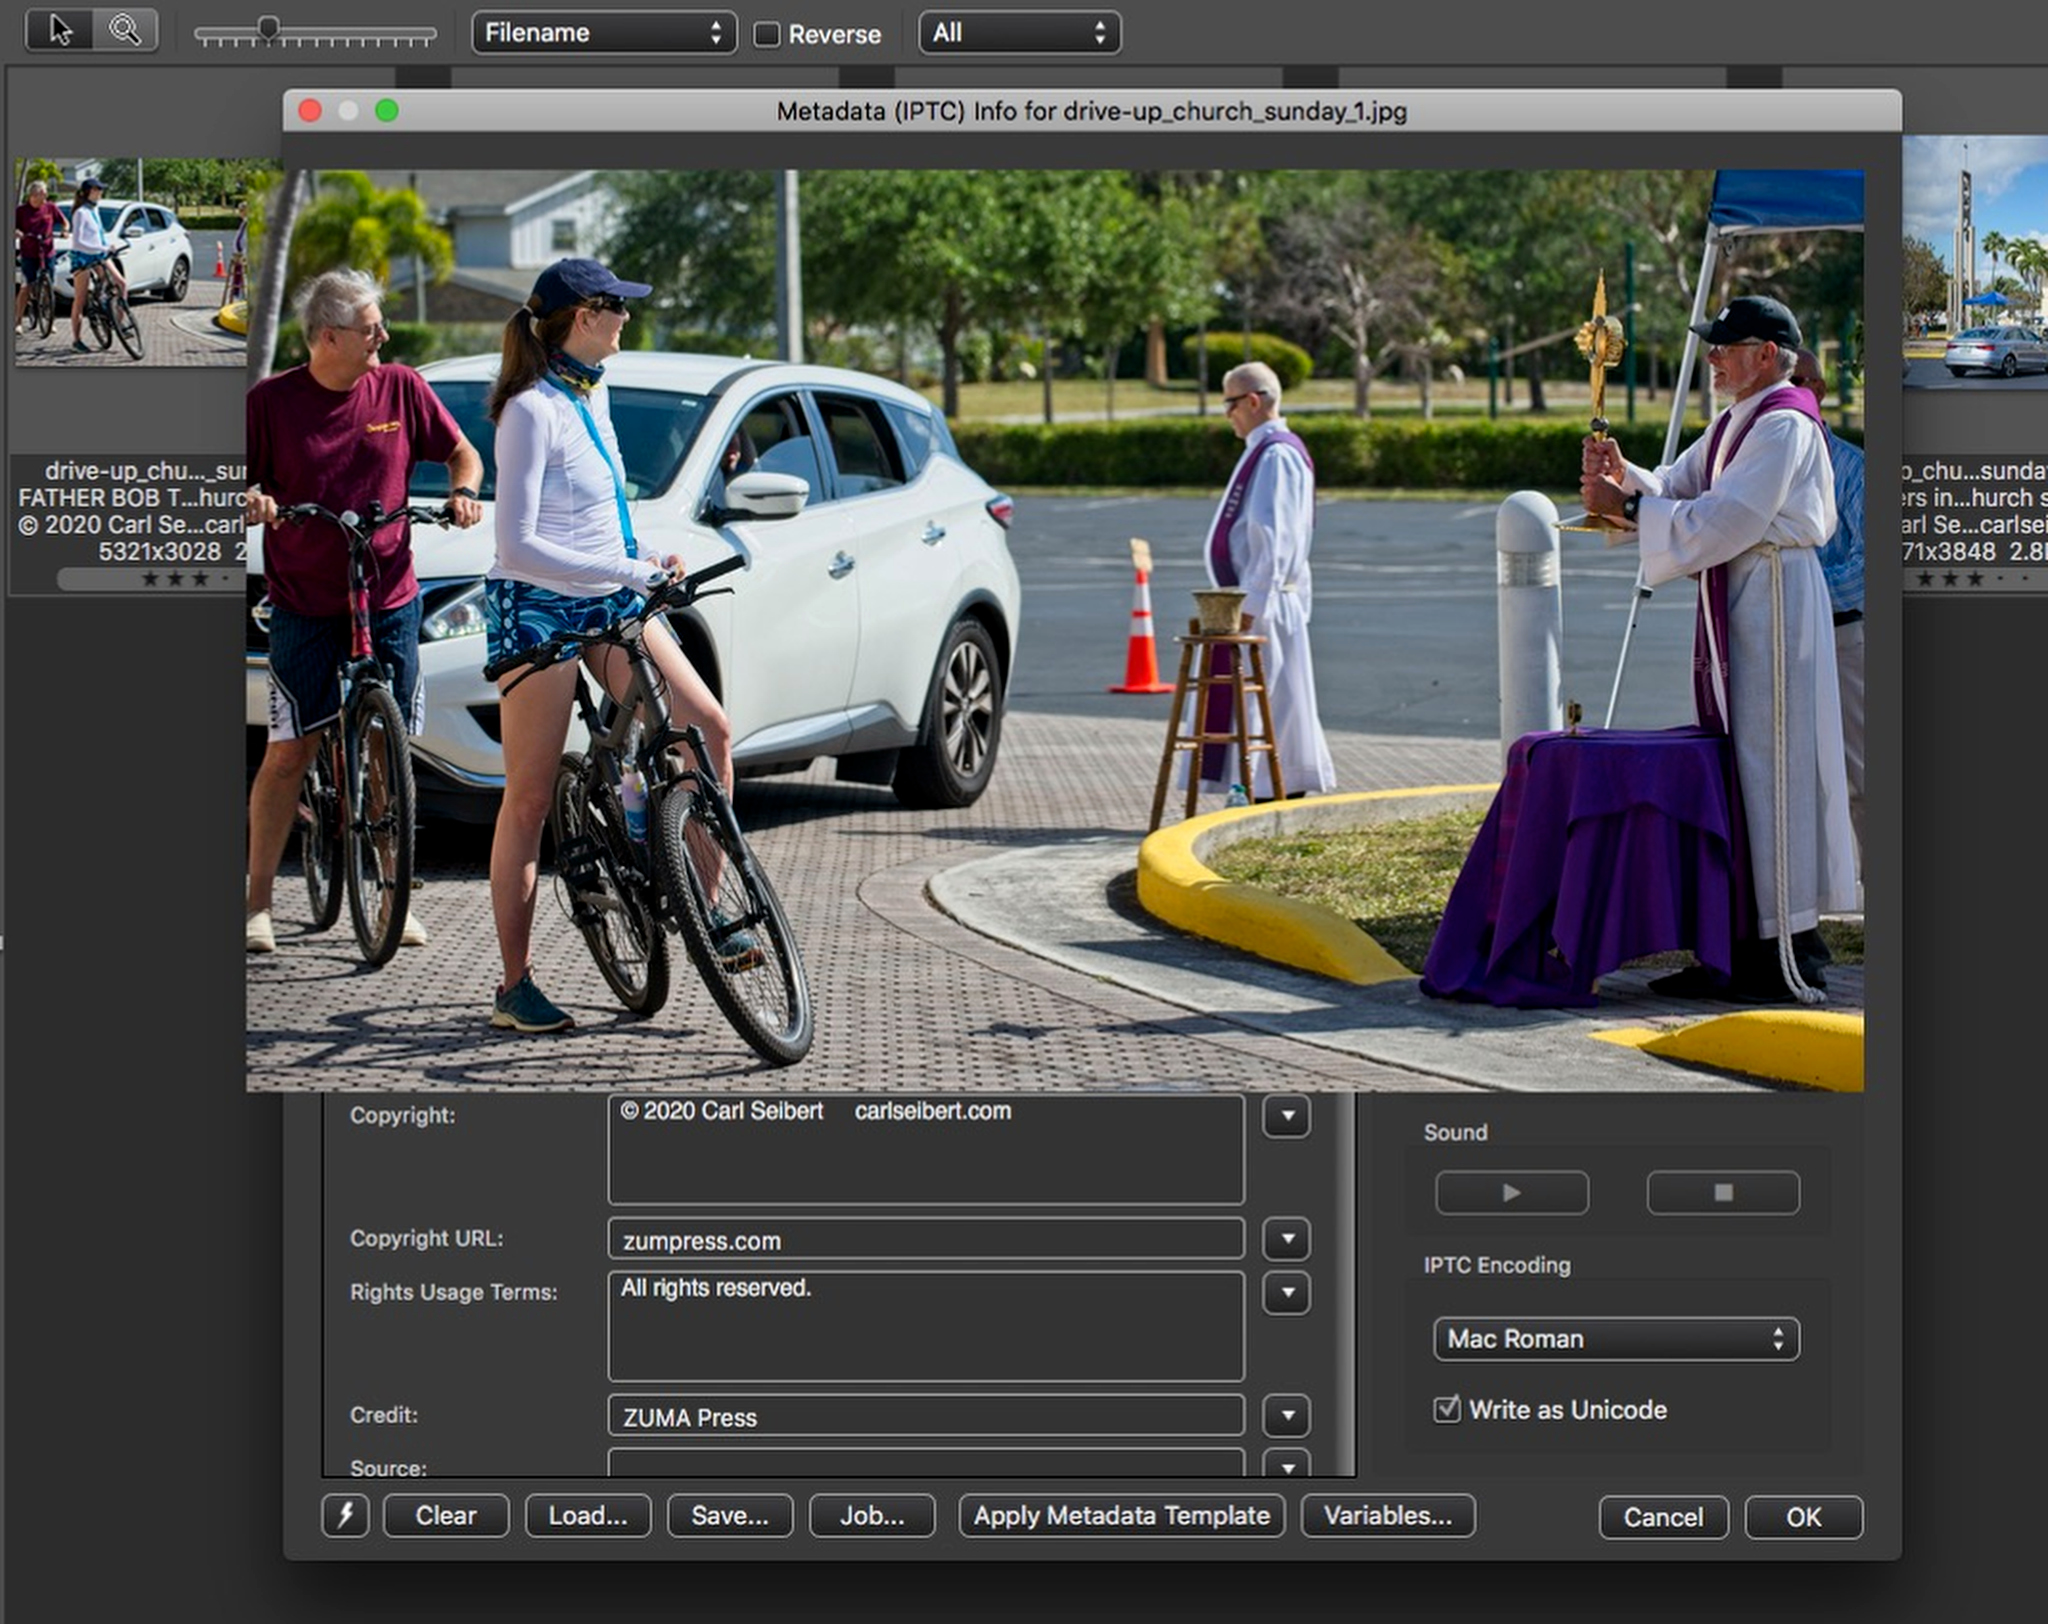
We click the “i” button for our image, or we press the “i” key on the keyboard, and the Editor opens. We can do this from the thumbnail or the preview. There is a small preview of the image in the corner of the editor. If we click on it and hold, a reasonably-sized preview opens. So, we can see what we’re working on.
We now load our standing template by clicking the Snapshot button (lightning bolt icon) and choosing our template from the list. Next, we fill in the caption, maybe add some keywords, do whatever else we need to do, and click “OK”. Simple enough.
(We could also load a template by clicking the “Apply Metadata Template” button. That button loads whatever is active in the template editor. Or we could import or export templates in .XMP file format with the “Load” and “Save” buttons. Choices. Choices. We’ll circle back to this.)
But, over years, we’re going to have to do this a few tens of thousands of times. We’d like to shave a few seconds off the time we spend on each image’s metadata. This is Photo Mechanic, after all. There’s some powerful stuff here we should know about.
The first difference between the two editors is that the IPTC editor can read existing metadata. So, we can use it to read or edit metadata to a photo that already has some – as long as we’re careful. We need to understand its core behavior: Exactly what we see in the editor is what gets saved. OK. Good to know.
To that end, we find a bunch of step-saving tools in the right rail of the dialog. You can assign ratings or color labels to the image. (Handy if you want to denote that you have captioned the picture for a certain client, for example.) You can save your caption (or not) and jump ahead to the next picture. You can copy your metadata to the clipboard to paste on whatever image you want.
By the way, Photo Mechanic is clever enough to read the Exif Capture Time or the file’s modification time and insert it into the IPTC metadata. Or you can automatically set today’s date. Or whatever date you like. (I’ll add here that the IPTC editor reads Exif Artist and Copyright information, if your camera writes it, and puts it in the appropriate IPTC fields. You can save it as written or change it or overwrite it with your template. Up to you.)
You can listen to voice notes, if your camera makes them. (Only a few high-end cameras do. But hey, if that’s the way you roll…)
For news photographers and other deadline workers, there’s a wonderful and mysterious button called “Save, Upload, & ->”. Wonderful because it does just what it promises. You can caption a picture, turn it in on the spot without losing your focus, and move on to the next one. Mysterious because this is one of a few very instances in Photo Mechanic where, to make it work, you have to use something that isn’t obviously displayed.

One of the things I love about Photo Mechanic is that, unlike, say, the computer operating system I’m using at the moment, I don’t have to be one of the cool kids and know a bunch of secret-handshake keystrokes to be productive. Not that there aren’t lots of labor-saving keystrokes. There are. But there’s a menu item or a button for darn near every last one of them.
That said, right here in the IPTC editor there are two way-cool functions that require a modifier key. This is one of them.

Before you can blast your pictures to your client in real-time using “Save, Upload, & ->”, you need to tell Photo Mechanic which client you’re rocketing the image to.
Press the ALT/OPTION key. “Save, Upload, & ->” turns into “Upload Options”. Click it.
The File Uploader will open. Now you can select one of the dozen and a half uploaders built into Photo Mechanic. (There are three flavors of FTP, plus most of the popular cloud storage/photo sharing/delivery sites like Box, Dropbox, Photo Shelter, Zenfolio, SmugMug, Flickr, and many others.) Choose your service, destination, and path. Close the Uploader. Photo Mechanic now knows where you are sending the missile. Fire when ready.

Look at the IPTC fields themselves. First off, you can arrange the fields in any order you want, show or not show whichever ones you want, make the big ones deeper or shallower, and even (as I recommend) make the type in the Caption bigger. (I have customized this dialog in my Photo Mechanic. Yours won’t look the way mine does in the screenshots.)
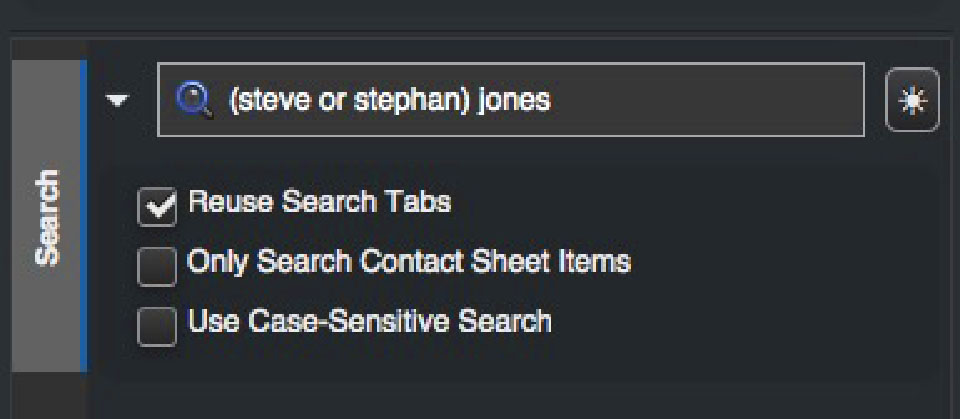
For each field, there is a flyout for choosing values from a controlled vocabulary. I highly recommend this, too. Especially for stuff like countries, states/provinces, and cities. Get them spelled right once and never type them again. You can also choose how auto-complete will work. For keywords, for example. I have mine set to fill values that I cribbed from my Structured Keywords vocabulary whenever I type the first three letters.
Well, the first thing I should say is that templates are shared between the two editors. You can edit templates just fine right here in the IPTC editor and use them in either place. There’s a bunch of shared stuff, actually. The controlled vocabulary flyouts and anything to do with variables, both “normal” variables and the specialized client and user ones, work in both places, as well.
But, how templates behave is different between the two editors. The IPTC editor overwrites whatever it might find already in the file. (Except the time element) It mows down anything in its path. For example, if your copyright notice in your template is different from the one your camera wrote in the Exif, the one in the template overwrites the Exif one. If you have a blank field in your template, you will delete anything that might already be in that field.
If you are captioning a single picture from scratch, this behavior is no problem. In fact, you probably want to do exactly what the IPTC editor does. Blank slate. Go from there.
But what if you are editing a caption you already saved? Well, most of the time, it’s OK. The IPTC editor reads what’s already in your metadata and saves it back on the file with whatever you add.
On the other hand, you might want to copy and paste metadata between, say, half a dozen portraits of some executive. I mean, come on, what more can you say after “….photographed in her London office on April 34th, 1970.” (And yeah, I know. Google doesn’t like repetitive captions. But what can you do….) Well, we could use the copy and paste buttons to apply that caption to our portraits. But what if each of those frames already has some unique information?
A Title/Object Name might already be applied. Or, in my case, I have Photo Mechanic write every frame’s original filename in the Transref field. (So I can easily find my way back to “_DCS-something-something” from the descriptively-named version I sent the client.)
If I use copy and paste, It’ll slap down the filename of the first picture over the correct filenames of the subsequent ones. Oh dear. We have to be mindful – and clever – about this sort of thing, lest we get stuck and have to re-do a bunch of work.
Or what if I have a folder full of pictures and I need to apply a template to groups of a dozen or so at a time? All of them, perhaps. Maybe I need to just add something to the end of the caption on each picture.
Now we need the Template editor. It can handle situations like this. Like I said, if you never have situations like this, you may never need it. But as I go on and try to balance the need to learn to do a better job with ever-increasing laziness, I find I use the Template Editor more and more.
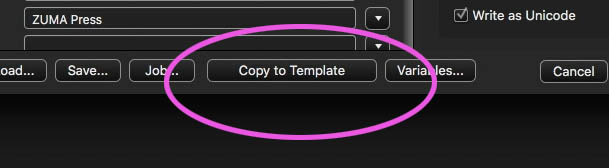
If we want to go to the template editor and load it with the data we have before us, we’ll hold down ALT/OPTION again and the “Apply Metadata Template” button becomes the “Copy to Template” button. Click it and whatever is showing in the IPTC editor will be loaded into the template editor, replacing whatever might already be there.
To recap thus far: If we’re in a save it-caption it-send it, one-at-a-time, workflow, the IPTC editor is the tool we’ll use. If we have to work around existing information or if we have to apply information cleverly to groups of pictures, well then, the template editor takes us where we want to be.
We can call the template editor with “CTL/CMD + i” or from “Image> Metadata (IPTC) Template…” from the main menu.
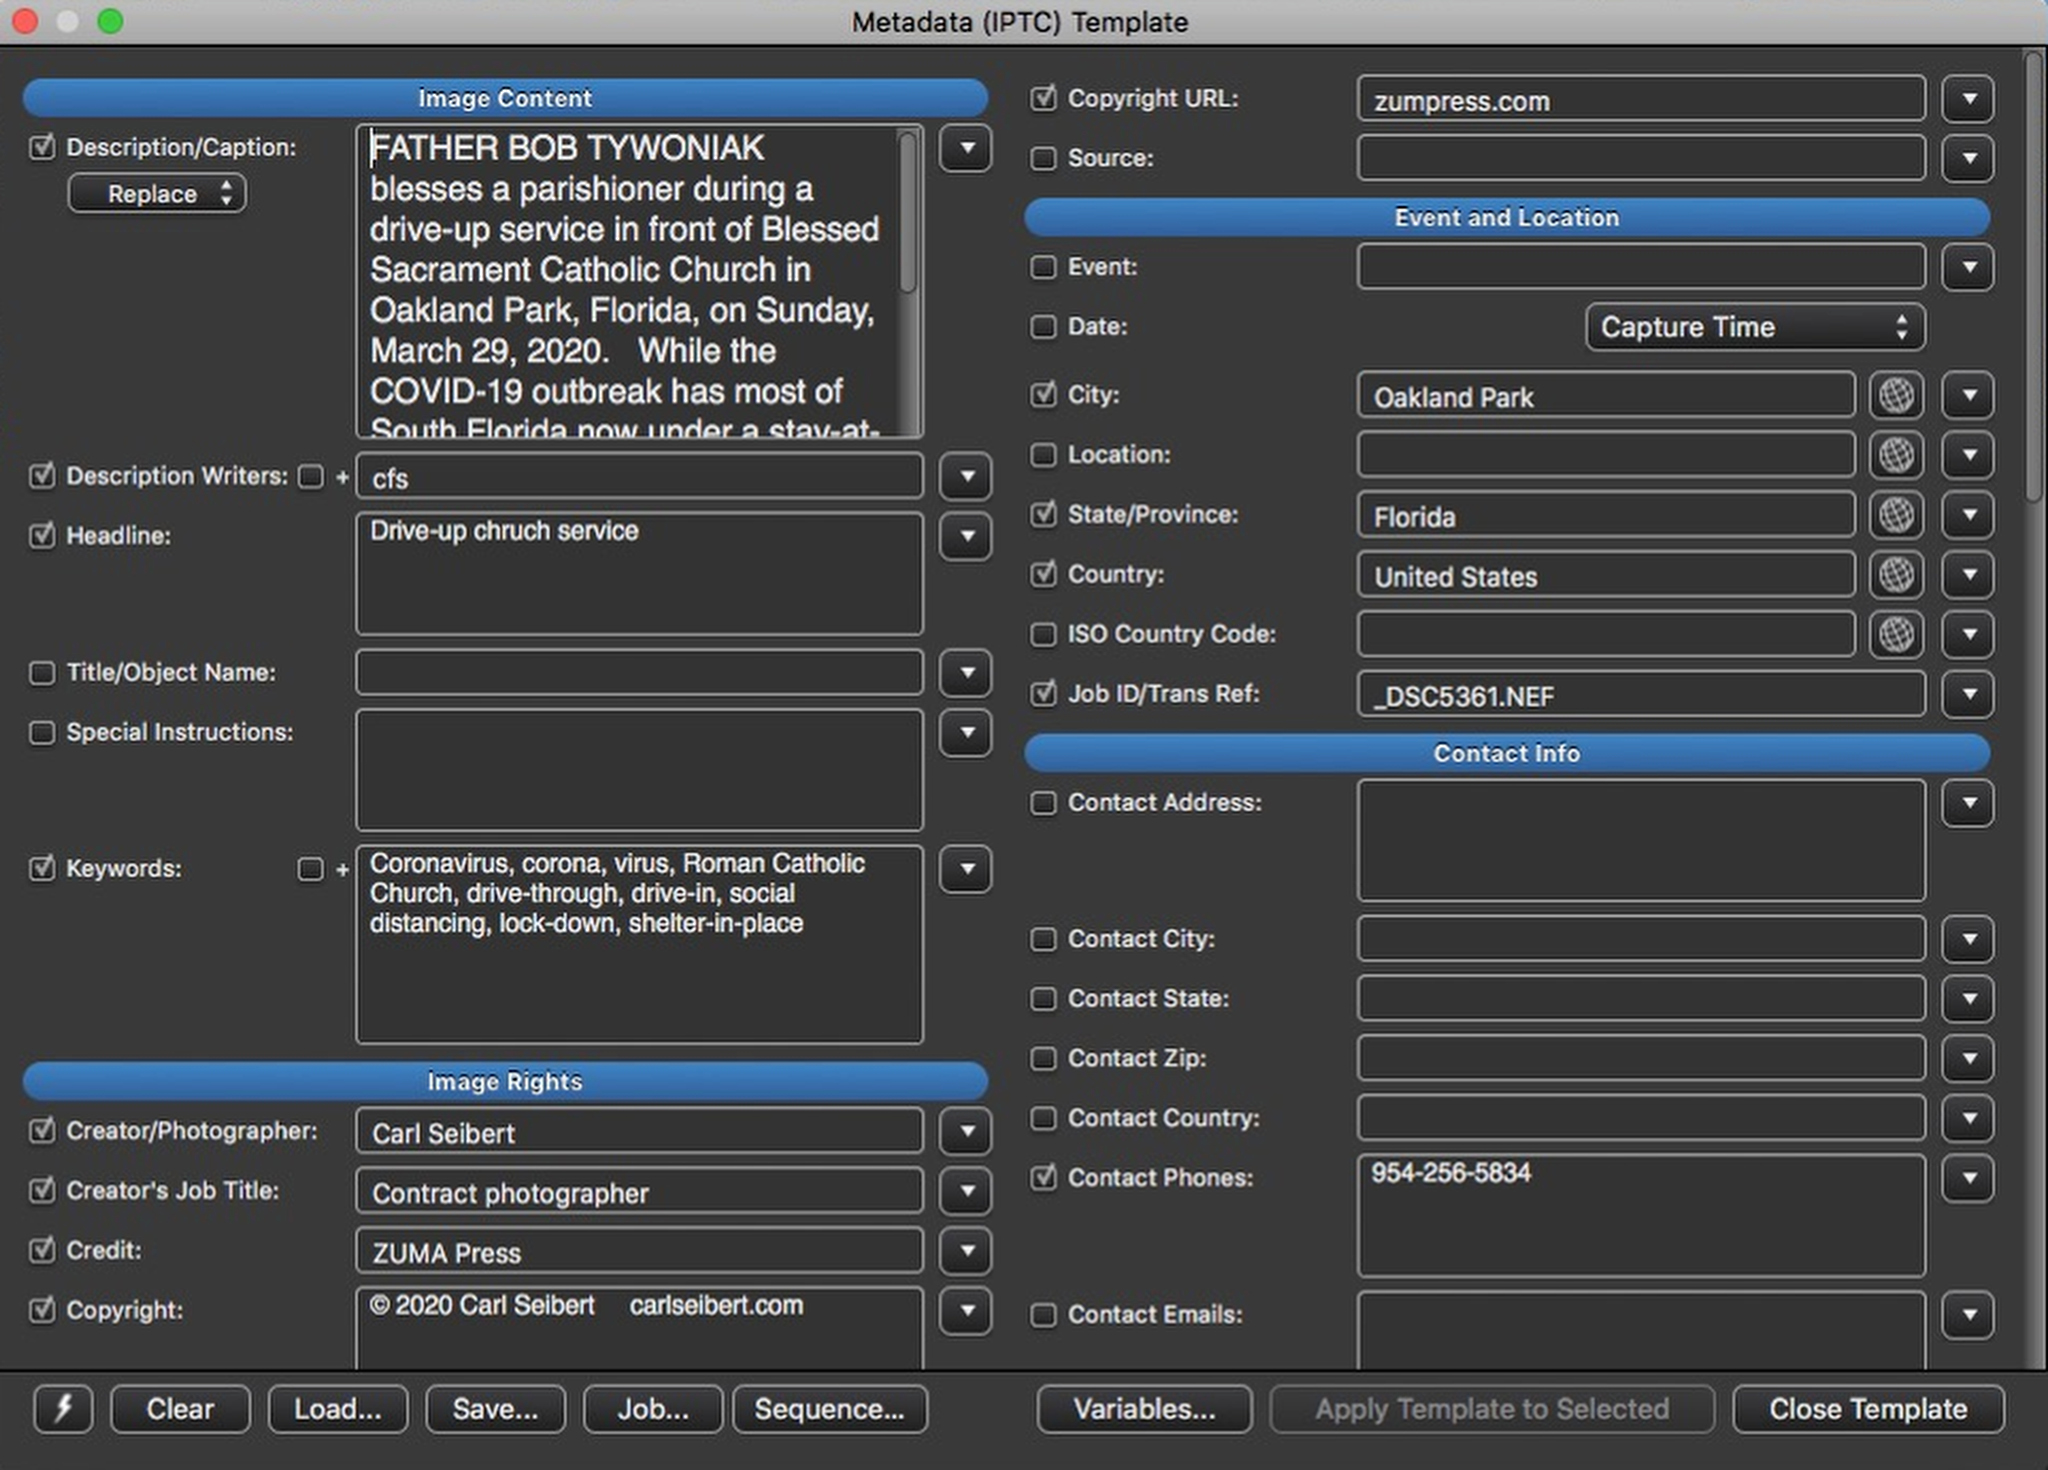
When it opens, we’ll see our IPTC fields, arranged in a two-column dialog box this time. If we opened it from scratch, the fields will be empty. If we got here via the “Copy to Template” button in the IPTC editor, we’ll see whatever values we had in the fields in that editor.
So, this is another rare case of a keystroke unlocking something we need to do. And it’s how we can read existing metadata with the template editor, which otherwise can’t do such a thing.
Most of the tools for actually manipulating data in the template editor are shared with the IPTC editor. The controlled vocabulary flyouts are here. As well as the templates Snapshot (and our templates) and all the variables tools. Not to mention the Reverse Geocoding buttons. This dialog is completely configurable, just like its sibling. (So, yours won’t look like mine.)
To use this editor, we’ll fill it with metadata (by hand or from a template) and apply that metadata either to selected images or via one of many places in the Photo Mechanic interface where we have the option to apply it. For example, we can apply a template to images we FTP, on their way out the door. That would be handy if we need to change something in the metadata for a certain client. In my case, linking a template to the ingest process is how I put my original filenames in the Transref field.
(We can also apply information from the template editor to selected images via the right-click context menu in the Contact Sheet (thumbnail) view. Or from Image > Apply Metadata (IPTC) Template to Photos in the main menu.)
But here we have some very different – and useful – behavior, compared to the mow-down-everything-in-its-path IPTC editor. Look to the left of each field in the template editor. You’ll see a tickbox.
If the tickbox is ticked “on”, a field is active and it will act just like it would in the IPTC editor. It will write, or overwrite, its contents, no matter what might already be in the field. If we turn on a blank field, it will delete what it finds and leave the field empty in the target.
Turn the tickbox “Off” and the field is turned off. Now it won’t write to the target field. If there’s information in the target field, it will be left alone.
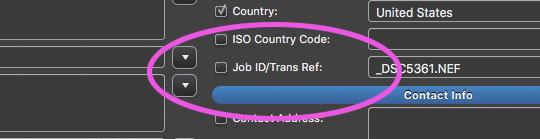
Let’s stop and think about how we could use this power. Let’s say I have those six portraits. If I use the template editor to caption them, I can turn the Transref field off, select the pictures and apply the same metadata to all six, without messing up my original filenames. (Or datestamps, for that matter.)
Of course, I could simply use this editor to apply my base template to a whole folder of images in one go.
Or maybe we want to add an embargo to Special Instructions in a bunch of photos that have already been captioned. Turn off all the other fields, enter our Special Instructions text and apply to selected and our embargo is added and no other fields are touched. Voila! Done.
(You can use the “clear” button to clear all the fields and all fields will be turned off. Then type in a given field and the one you just filled will automatically turn on. Double-check first, of course. But this is handy.)
The Caption, Description Writers and Keywords fields have some additional options.
Caption sports a pulldown that lets us choose to replace (overwrite) whatever might be in the Caption or Prefix or Append it with whatever we put in Caption here in the template editor.
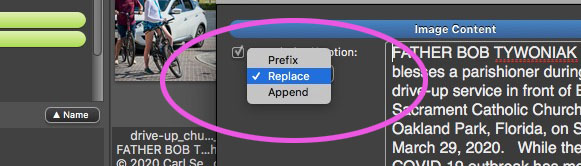
Want to put an inline byline after the caption on some pictures or add some housekeeping information before the captions? This will do the trick.
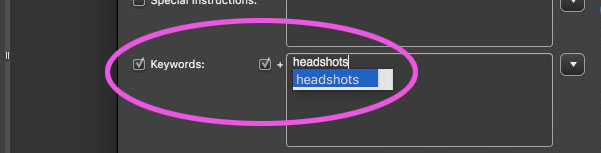
The Description Writer and Keywords fields have an additional tickbox, with a “+” symbol. Turning on this tickbox will append the values we add here to whatever already exists in the fields.
Obviously, we’ll use this feature all the time with keywords. Need to add “headshots” to groups of pictures that are, well, headshots? Boom. Done.
Why the heck do we have this appending feature on Description Writer? This a feature aimed straight at wire services and photo agencies. (Core markets for Photo Mechanic.) An editor at a wire service might translate a caption. Or correct something. Or add some housekeeping data. The original caption writer still wrote the caption. But the editor is accountable for whatever changes he or she made. Air traffic controllers say their initials over and over for the sake of the audio log tapes. Wire service editors append their initials to the description Writer field. Same principle.
We use the Template editor whenever we have to work around existing data or if we need to apply data to multiple images, either manually or automatically when we use some file management function.
We use the IPTC editor if we are working from scratch, on more or less a one-photo-at-a-time basis.
The two editors give us the ability to work with metadata deftly, cleverly, and quickly. They also give us the ability to screw things up on a grand scale if we don’t look before we leap.
Think carefully about your workflow and what you want to accomplish, especially if you are tempted to use the IPTC editor in a way that isn’t a straight-forward case of working from scratch on a new file. Once we decide on the right path, choosing the right IPTC editor dialog lets us power our way through a bunch of work in a hurry.
I have quite a few posts and videos on various aspects of using Photo Mechanic here and on my YouTube channel ( metadatamatters.blog/youtube ). If the search function on this site doesn’t find what you’re looking for, by all means, jump in the comments and ask.
Beginning today, May 27, 2020, Google Images will display image rights metadata just under an image’s preview rather than hiding it behind a link. And in a separate victory for artists rights metadata, website hosting company SquareSpace has announced better support for rights metadata.
In late 2018, Google Images began to support embedded IPTC metadata that identifies the photographer and copyright owner of an image. (As long as that information isn’t stripped away by the website that published the image.) If an image contains rights information, users could click on a link for “Image Credit” information to see who shot the picture and who owns the copyright.
The new feature – live today – presents the information right under the picture.
If there’s no rights metadata on the image, users will still see “Images may be subject to copyright”.
The Google Images team told the IPTC’s website that, “We are committed to helping people understand the nature of the content they’re looking at on Google Images. This effort to make IPTC-related information more visible is one more step in that direction.”
Google’s new presentation will help educate and empower honest users of the web about copyright. Accordingly, this blog applauds enthusiastically. Respect.
Early this year, Google announced that it would introduce another new rights-related feature in Google Images. Driven again by embedded IPTC metadata in a picture or by Schema.org markup on a webpage, this one flags pictures that might be legally available for use. Images that carry appropriate information to facilitate contact between a would-be user and the image’s owner will display a “Licensable” badge. A link to the image owner will be provided.
(Googe’s Licensable feature is currently in beta. It was slated for release by now, but according to the latest from Google, the COVID-19 pandemic has slipped the date back to sometime in the summer.)
Photographer Penny Gentieu is working with her daughter Anna Friemoth, also a photographer, on a new website. They’re using the Squarespace web hosting service.
Squarespace markets heavily to photographers. YouTube watchers will instantly recognize the brand. Seemingly every second photography channel lately features host-read endorsement ads pitching Squarespace as a platform for photographers’ websites.
Gentieu and Friemoth were excited by Google’s new support for photographers. But they were mortified to discover that Squarespace stripped the requisite metadata from photos.
After a less than successful interaction with Squarespace’s customer service department, Gentieu wrote a story pleading with the provider to stop deleting the metadata. The article appeared on PetaPixel, a large website devoted to photo industry news. It spawned a spirited comments chain, even including a response from Squarespace CEO Anthony Casalena.
Within two days of the PetaPixel editorial, Squarespace wrote to Friemoth: “Hello there, We’re replying here to let you know that we fixed this issue. Going forward, this metadata will not be removed from images uploaded to the platform.”
Gentieu’s tenacity. Google’s improved commitment to artists’ rights. Unheralded hard work behind the scenes by the IPTC. PetaPixel’s reach. And Squarespace’s responsiveness. And we all benefit from two significant advancements for photographers and honest users of the internet in a single week. To each of you, a heartfelt thank you!
If you are a photographer, please, please make sure you are embedding proper metadata in your photos. If you have a website, do the right thing and make sure your site respects metadata. You can learn about doing those things right here in this blog. And if you have more good news for our industry, let us know in the comments.
The entire Licensors structure is now available in Photo Mechanic; Google Licensable will expose two of the fields
Photo Mechanic has released support for the PLUS Licensor metadata fields that will be exposed in the new Google Licensable feature. You’ll find it in Photo Mechanic 6, Build 4538, and later. (The fields have been in the PM+ beta for a while.) The entire Licensor structure is supported, some twelve fields, with the ability to list all that information for multiple licensors.
Licensors writes to PLUS (Picture Licensing Universal System) XMP fields, part of the IPTC Extended schema.
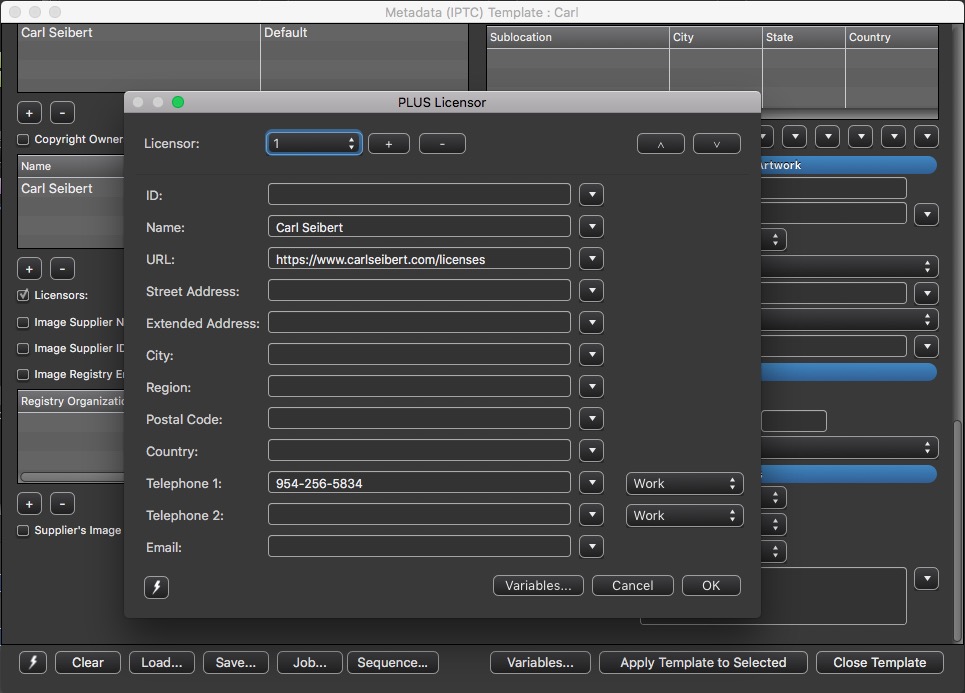
In the interface, you’ll see the label “Licensors” and a button with three dots. Click the button and a pop-up dialog appears with all the new fields.

Fill in the fields according to your taste. Google will expose the Licensor Name and the Licensor URL. I chose to add my business phone number, as well. If somebody wants to talk to me about a picture, I want to make it as easy as possible. All the normal contact fields are available, along with one for your PLUS ID, if you have one.
If you don’t see the button in your IPTC Editor or Template Editor (formerly Stationery Pad), you’ll need to go the preferences for those dialogs and turn on Licensors. This is likely the case of you have customized your metadata dialogs. I have, so I had to turn on the new gizmo.
Go to Preferences> Acccessibility>Customize and choose a button for “Metadata (IPTC) Info”, or “Metadata (IPTC) Template”. The appropriate configuration dialog will open.
I found Licensors waiting at the bottom of the list of fields.
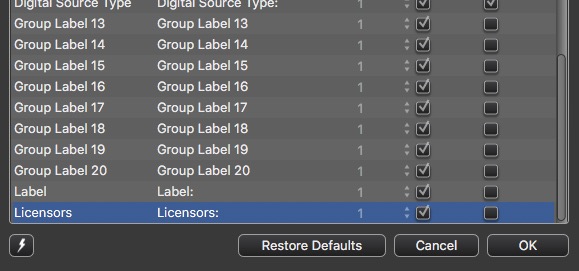
Tick to turn on “Enabled” and “Visible”.
Drag Licensors to wherever you want it. I put it in with some other PLUS fields.

Remember to make a new Snapshot.
Make sure to fill in the fields in your templates.
And you’re good to go.
Update on Google Licensable
Apparently, the COVID-19 crisis has affected both Google and the photo licensing agencies involved in the beta of Licensable. The latest word is that Google now intends to make the feature live “in summer”. Hopefully, the crisis won’t worsen and we’ll start seeing Licensable badges in a few months.
Be on the lookout. When you spot the first Licensable badge, jump in the comments and let us all know. In the meantime, stay safe out there!
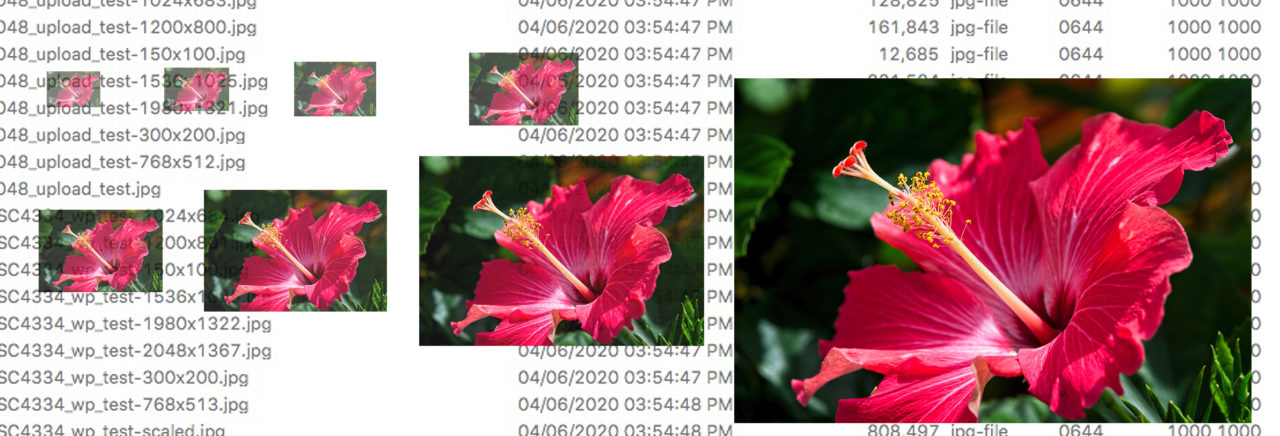
Optimizing images for WordPress. There’s been a lot of digital ink spilled on the subject. There are tons of urban myths swirling around. There’s stuff that’s true, stuff that was true five years ago, stuff that was never true, and stuff that’s way over complicated or just plain wrong.
But the real lowdown, circa early 2020, is stupid simple.
You don’t optimize images for your WordPress site. WordPress does it.
All you have to do is upload a good quality image, at the largest size your site will need, saved at a JPEG compression of 82 or higher.
And, by the way, make sure you have ImageMagick enabled as your imaging library.
That’s it.
Now here’s the long-read version