New camera adds content authenticity metadata to photos, helping in the fight against disinformation. A content credential proves your picture is real. You probably want that. We look at how it works and what it means.
New camera adds content authenticity metadata to photos, helping in the fight against disinformation. A content credential proves your picture is real. You probably want that. We look at how it works and what it means.

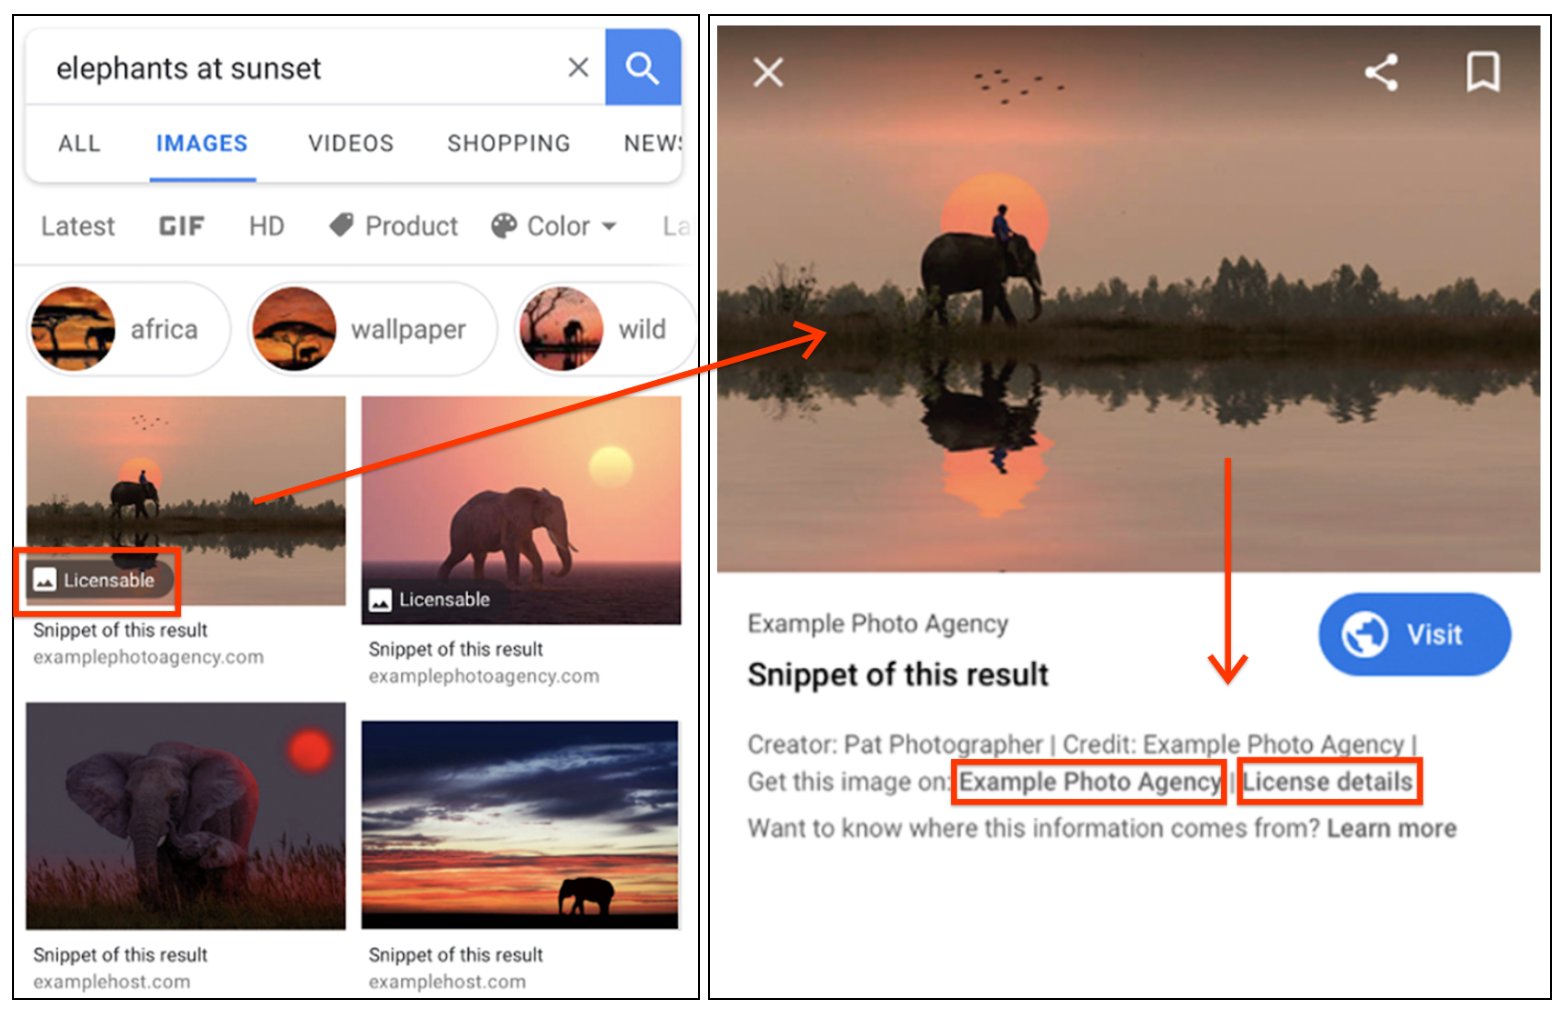
Google is beta testing a new feature that will help honest people obtain licenses to use pictures found on Google Images. “Licensable” will help identify images whose owners can be readily found. Cash can be exchanged and a license issued in the speed of a click. Or an email or phone call.
(Many copyright owners I have dealt with have been so blown away by somebody approaching them for a legit license that they have just given me the license. Honesty pays. I kid you not.)
Three IPTC fields new to Google Images will drive the new feature. This is in addition to the three fields that Google has supported since late 2018.
The Web Statement of Rights field, which is known in most software as “Copyright URL” will drive a “Licensable” badge on an image in Google Image search results (see illustration above) and, if the field contains a valid URL, a link for “License Details” will appear on the image’s preview. (“Valid” here means the whole URL, beginning with the protocol, like this: https://www.carlseibert.com/licenses ) This is the most important of the new-to-Google fields. Google is now telling website operators that stripping metadata from images is not a good thing. Look at the bottom of this help page where Google tells webmasters – ever so gently – to leave copyright metadata alone! Woo! Hoo!
Google describes the URL in Copyright URL as “A URL to a page that describes the license governing an image’s use.” For most non-Creative Commons images, there is no license yet for whatever use a Google Images user might have in mind. That’s the idea – to arrange for such a license. So, Google’s description can’t be taken too literally. I’ll come back to this.
Missing from the mockup Google released is the image’s copyright notice. The contents of the Creator and Credit fields appear more prominently than before. But where’s the copyright notice? Maybe clicking on the photographer’s name brings up the copyright notice? If the contents of the Copyright field aren’t revealed, that could be a big issue. Hopefully, this will be sorted out in the beta process.
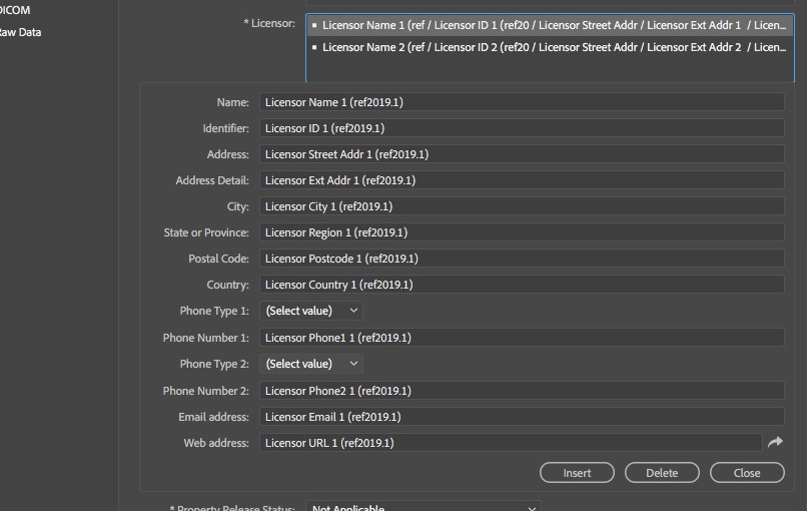
Licensor and Licensor URL, relatively unknown fields in the PLUS portion of the IPTC’s Extension Schema Standard, will drive additional links for the name of an agency/licensor and “Get this photo on:”. This part of the feature is clearly aimed at photo agencies. The URL could point straight to a purchase page for that particular photo.
There’s no harm in just putting your company name and link to whatever page on your site is best for dealing with folks who want to license a photo here. Or, on the other hand, honestly, I don’t see any harm in individual photographers just skipping this field. Which is a relief, since most of us won’t immediately have access to the Licensor fields in our software anyway.
For what it’s worth, I think the way Google has laid out these links in its current beta (see the main picture above) is backwards. I think that they should start with a link for “Licensing Details” (which will be driven by the most likely populated field), followed by “Get this photo on:” which can really only help out in those cases where a license may be purchased online. We’ll see what happens as Google proceeds with the beta.
Google is trying to clean up the copyright thieves bazaar that the internet and that their product, in particular, has become. It is in our interest as content creators and publishers to help out in any way we can. It’s our stuff that’s being stolen and our web pages where the stolen stuff ends up.
Moreover, it’s dead easy to be on the right side of this.
What do we have to do?
Photographers need to make sure that they embed proper metadata in every image they send out into the world. Readers of this blog already know this.
To review, Google Images already exposes the contents of the IPTC Creator, Copyright, and Credit fields. Double-check to make sure your template fills these fields properly.
The Creator field just needs your name.
The Copyright field holds your copyright notice. There is no legally required format. Just tell everybody you own the copyright. Adding some minimal contact information, like your business phone number, really helps.
The Credit (or “Creditline”) field is trickier. Traditionally, this field holds the name of whomever the photographer is working for. For a published credit that reads “Suzie Photographer/The Widget Times”, ”The Widget Times” goes in the Credit field. Nowadays, some people are putting the entire credit string in this field. Which freaks out automated publishing systems, yielding something along the lines of “Suzie Photographer/Suzie Photographer/The Widget Times”. Sigh. Your choice. Or don’t use the field at all if you don’t need it. Neither Google nor I will judge you.
I have written about the Copyright and Credit fields before. Visit this post. The search feature on this site will return some more posts that talk about Copyright.

Copyright URL/Web Statement of Rights needs valid content for you to benefit from the new Google goodness. Make sure the value in your template is complete, including that beginning “https//” or “http//”.
But where should the URL point? Mine used to just point to the front page of my site. I figured that anybody who wants to reach me will be able to click “Contact” and all will be good. But I didn’t have “https//” in the URL, so by Google’s lights, it would have been for naught.
What I recommend here is for you to make a simple landing page for people who might want a license. “Hey, thanks for your interest in my work. Talk to me and we’ll hook you up.” is all you basically need to say.
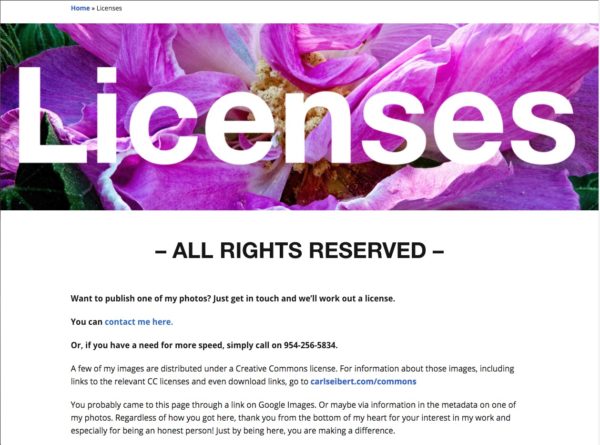
I made such a page for this site in a matter of a few minutes. It doesn’t appear anywhere on the site’s navigation menus. The only visitors who will see it will be coming from a link in my metadata, so it doesn’t have to be fancy at all.
If you have a page on a photographer’s portfolio site like Photo Shelter or Zenfolio or SmugMug, from which users can buy licenses, you could link there. Or you could make a landing page on any of those sites, too.
Or… I imagine that just linking to your home page or contact page would still be OK.
If you’ve got ‘em, smoke em. It’s basically no work on your part to fill them in on your template and then you’re good to go. If you don’t have access to those fields in your metadata editing software of choice, I wouldn’t sweat it. By properly filling Copyright URL, you’ve got the “Licensable” tag and 90% of the benefit of the feature. Anybody who wants to buy a photo from you has the information they need to do so.
Of course, remember to add a good caption! Google doesn’t read embedded captions (yet). But identifying what’s depicted in am image is the main point of metadata.
Once a lot of images are tagged, the Google Images environment will be a better place – a little more honest-people-friendly and a little less thief-friendly.
I scanned through the software I cover to see which programs support these newly important fields and which didn’t.
Photo Mechanic – Supports Copyright URL, but doesn’t yet support Licensor and Licensor URL. Photo Mechanic’s lead developer Kirk Baker told me that his team is aware of the issue and is discussing potential solutions. Support is forthcoming.
Update Late April 2020: Photo Mechanic 6 now supports the entire Licensors structure, including Licensor Name and Licensor URL. See this post for more.
ON1 Photo RAW – Supports the Copyright URL field, but not the Licensor fields.
Photoshop – Supports both Copyright URL and the Licensor fields.
Adobe Bridge – Supports the Licensor fields, but not Copyright URL. Copyright URL is part of the Core Schema. What. The. Heck? I looked carefully. If I made a mistake, please let us know in the comments.
Adobe Lightroom Classic – Supports both Copyright URL and the Licensor fields.
Capture One – Does not support Copyright URL or the Licensor fields.
XnView – Does not support Copyright URL or the Licensor fields.
In sum, this is a zero-work thing. (Unless you’re using software that doesn’t support Copyright URL) Check your templates and you’re good to go. Depending on your software, “Get this photo on:” will either work now or be available to you later.
What do those of us who operate “normal-size” websites have to do to make our web pages work with this new Google feature?
Not much.
Just make sure your website does not destroy metadata. Then Bob’s your uncle. Or substitute whatever cliche for things being hunky-dory you prefer. Regular readers of this blog probably already have their sites whipped into shape.
To make sure, just grab a photo that you know has IPTC metadata. Put it on one of your pages. Visit the page in a browser. Right-click and download the picture. Go to the IPTC’s online metadata viewer here, or from the link at the bottom of this page. Or use any metadata-capable program.
If the metadata is there, it’s all good. You don’t have to do a darn thing and you and your contributing photographers can rest easy.
If you don’t have a marked-up photo handy, you can download the IPTC’s standard test image here. It has LOTS of metadata. I wouldn’t put it on a visitor-facing page, but that’s just me.
If your website fails the metadata round-trip test, the chances are it can be fixed in a jiffy.
A plurality of all websites (some 35% of the entire web) run on WordPress. WordPress will use the imaging library ImageMagick if it’s available and has been enabled in PHP. Most WordPress hosting services offer ImageMagick. By default, ImageMagick supports metadata.
Turning it on is incredibly easy, but the exact method you’ll need to use depends on your host. Some hosts have easy-to-follow instructions in their documentation. For others – most of them, really – you just contact customer support via chat or phone and they’ll either tell you what to do, or more likely, just take care of it for you. Problem solved.
More and more WordPress hosts are enabling ImageMagick by default. If your host has already hooked you up with ImageMagick, we don’t need to be having this conversation. But props to your host!
The “other choice” for WordPress sites is an imaging library called GD. GD ships with PHP and is used if ImageMagick isn’t there. GD strips metadata. Currently, GD is at version 2.25. Support for metadata is on the roadmap for GD v2.4. When that day comes, it will be good news for content creators everywhere. But it might be a while.
Many big websites use the Drupal CMS. Drupal users need only install a couple modules and they will be able to choose their imaging library in Drupal’s GUI. That will take a good healthy three or four minutes. The hardest and most tedious part by far is reading my How-To post on the subject.
Super-fancy, custom-built websites, like the big news sites, may use any imaging library, but the chances are pretty good that a given site uses ImageMagick. And ImageMagick has likely been told to strip metadata. If that’s the case, it’s as simple as telling it not to by deleting an argument. Obviously, that’s a developer thing. And nobody is going to change a live server absent a pretty good argument for doing so. But when it comes down to it, it’s not a big deal.
If your website is static and your images are processed externally from your site and you have metadata stripping going on, just tell whoever or whatever is doing the stripping to stop doing that!
You can also enable the Licensable feature on your page itself, with schema.org structured data. This is a page-by-page and image-by-image thing, and you have to do it, as opposed to just letting Google parse the embedded metadata from your images. That’s a lot more work. Structured data is able to override embedded metadata, so that might be a reason to go that way.
This Google reference page explains both methods.
Here is the IPTC Quick Guide to Google Images and metadata.
Photographers and website operators alike – when should we make ourselves ready?
Well, right now would be good.
Seriously, we’re only being asked to do stuff we should already be doing anyway. All we really need to do is check and make sure our metadata templates are in good shape if we’re photographers and make sure our website is behaving as it should if we are website operators. We should check this stuff periodically anyhow.
Google says that Licensable should be up and running by late April, 2020. The more compatible content we have up before then, the better.
Google is saying that participation in Licensable will not be a ranking factor. That makes total sense. Right now there just isn’t enough properly marked-up content out there for Google to use as a basis for judgment. That said, in the long term, doing stuff that Google asks us to do is usually works out to our benefit.
Google has once again moved a step closer to a better world, where images are more likely to retain the information that makes them relevant to society. It took a bit of a lawsuit nudge to get Google’s heart in the right place, but no matter. Their momentum is in the right direction. Will it all help? Let us know your thoughts in the comments!
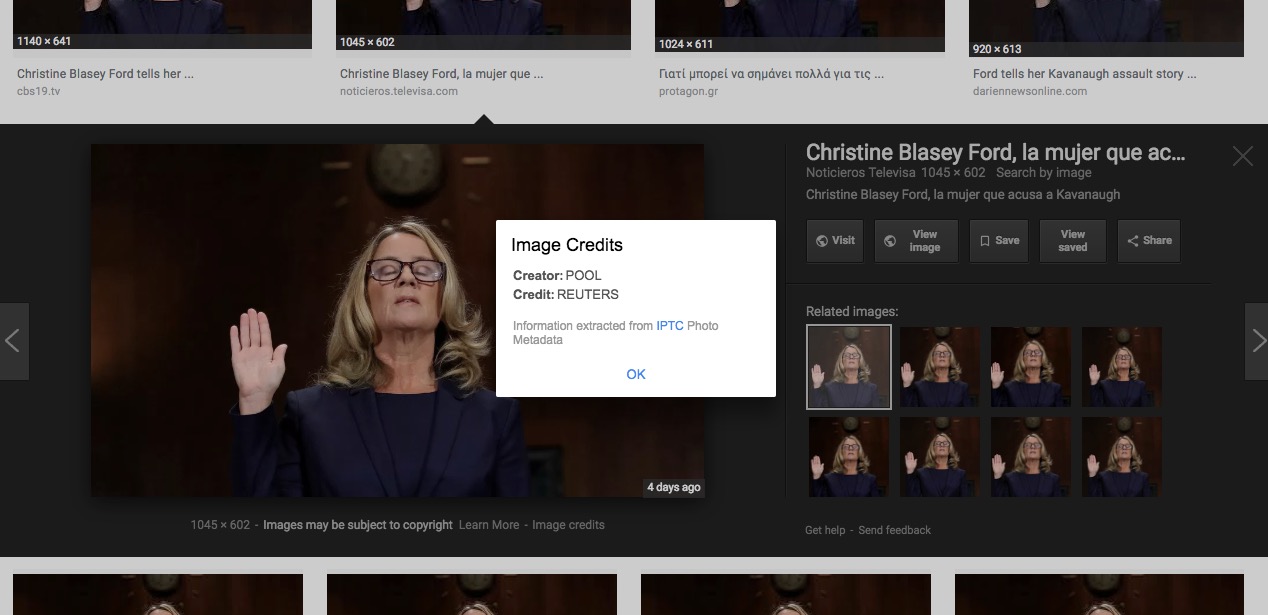
On September 27, Google announced that it would include limited support for IPTC metadata in Google Images. Next to the gratuitous “Images may be subject to copyright” disclaimer, users may now find a link for “Image Credits” if that metadata exists in the photo. They can now see for sure who owns the picture. That is, if, the relevant metadata exists in the image file.
Google will now display to users, at least those who look, the contents of three copyright-related metadata fields - the IPTC Creator, Creditline, and Copyright fields. (The first two are operational now, the latter will be “in coming weeks.”)
This is a huge step forward for photographers. But “if” the metadata exists means we have to put it there.
This post is a HOW-TO for putting it there.

Which instance of the IPTC metadata does your favorite application prefer? Inquiring minds want to know.
Let’s step back for a moment for some background. Because all things that should be dead simple usually aren’t, the IPTC metadata - important information like the caption, your byline, and copyright notice - is stored in multiple places in your file.
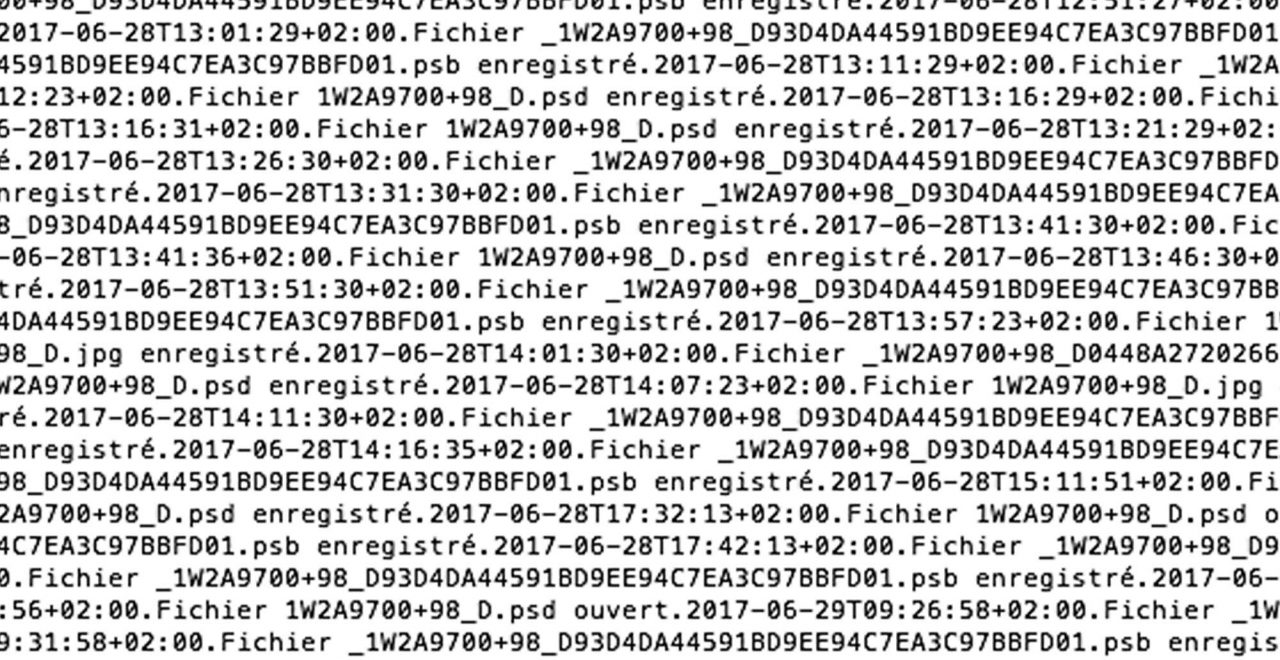
Last week’s release of new French president Emmanuel Macron’s official portrait, by photographer Soazig de la Moissonnière, caused a stir on Twitter. Metadata on the version of the photo released on the government’s website revealed that somebody had the picture open in Photoshop for some fifteen hours. But vital information was left off the photo.


In this post, we’ll learn how to import, export and exchange metadata templates between Photo Mechanic, Adobe Lightroom, Adobe Bridge, Adobe Photoshop, and XnView.
We can easily import and export metadata templates to and from our image/metadata editing applications. We can send and receive templates from clients, for example, and we can standardize templates between different applications or different computers in our own environments.
Watch the video version of this How-To
(Photo Mechanic at 0:25, Lightroom at 5:56, Bridge at 7:44, Photoshop at 12:25, XnView at 14:16)
Templates save time and reduce errors on repetitive tasks like applying base metadata to images. You should always use a template. Always. Always.
For this tutorial, you’ll need to have .XMP or JPEG metadata templates. You can use the ones from my starter kit.
Download a starter IPTC template here…
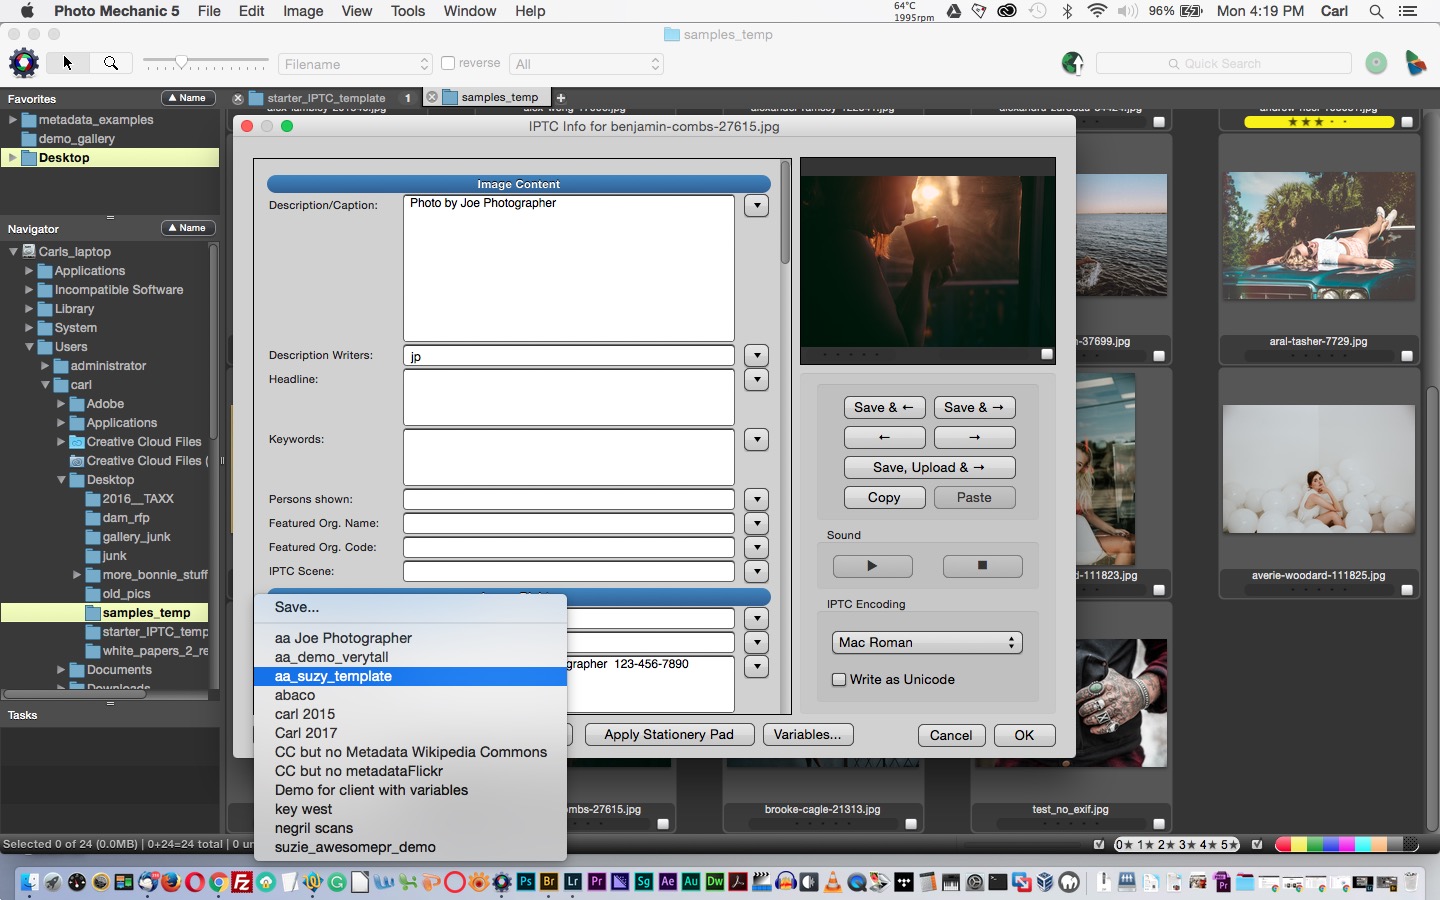
Photo Mechanic can import and export .XMP template files.
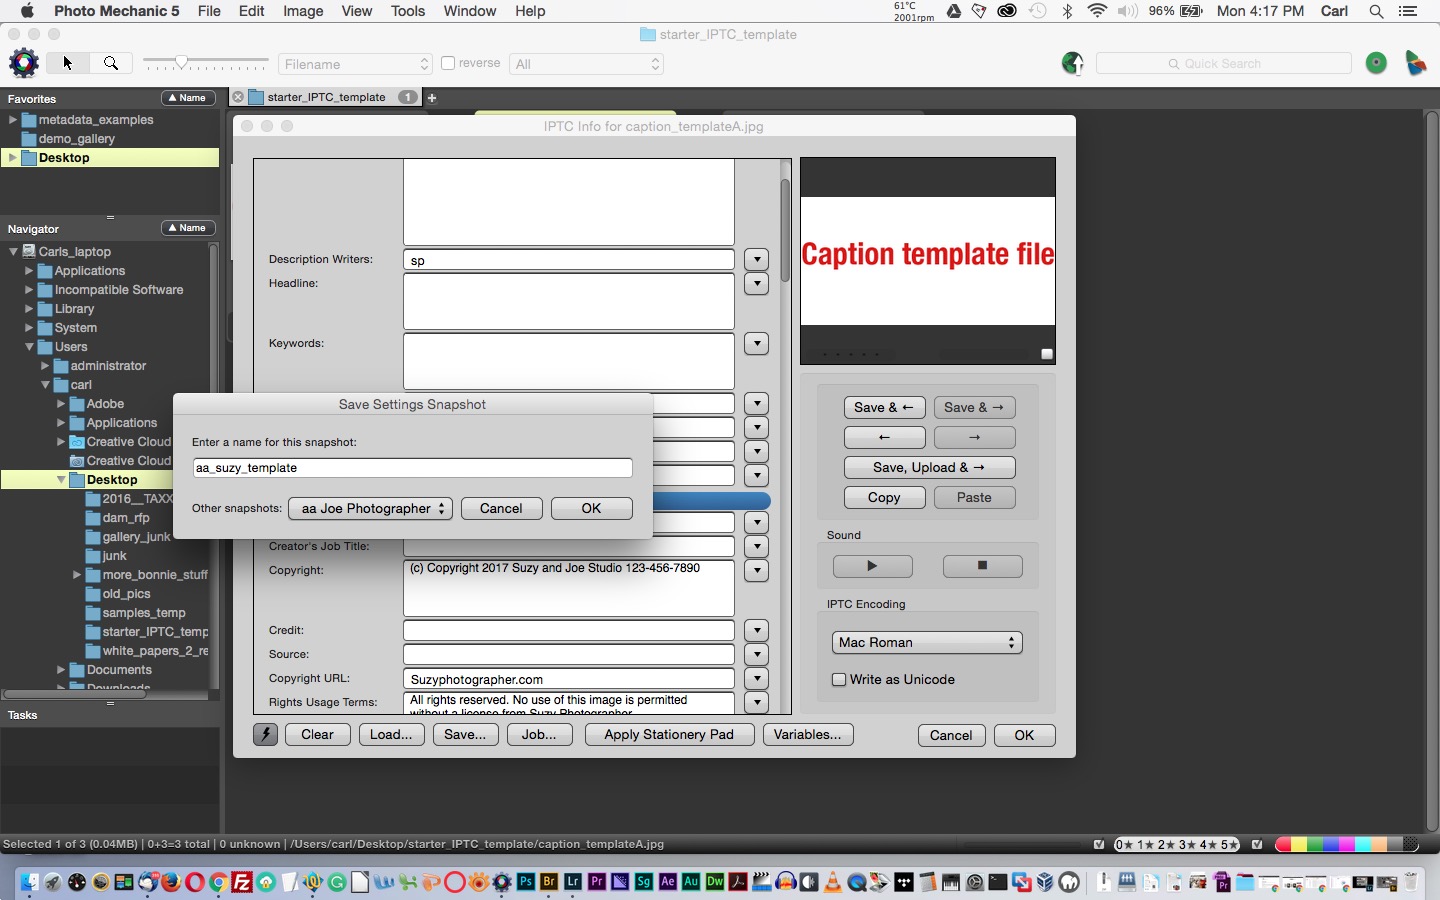
We can import or export templates in either Photo Mechanic’s IPTC Stationery dialog (CMD or CTL + I) or its per-image IPTC Info metadata editor. (Just the I-key, or the ‘I’ button on a slidemount in the contact sheet view.) Templates and Snapshots are interchangeable between the two tools. For this tutorial, we’re going to use the IPTC Info editor.
Lightroom cannot work with .XMP files, so we’ll use a JPEG metadata template.
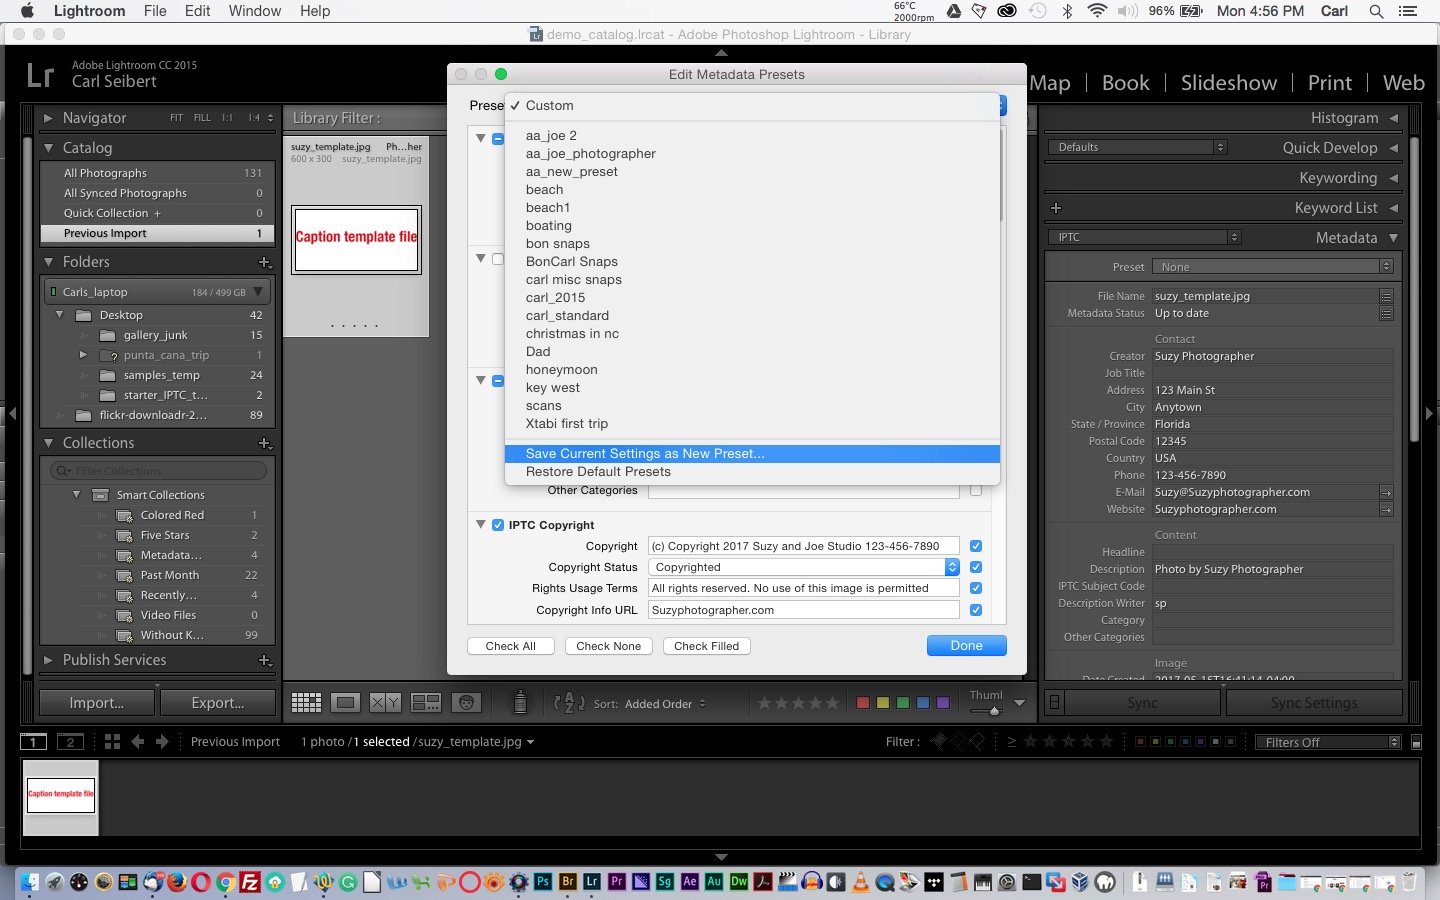
You’re done. Now your new preset (template) will be available in the ‘Presets’ flyout in the metadata panel and anywhere else in Lightroom where you might need it, like the Import dialog.
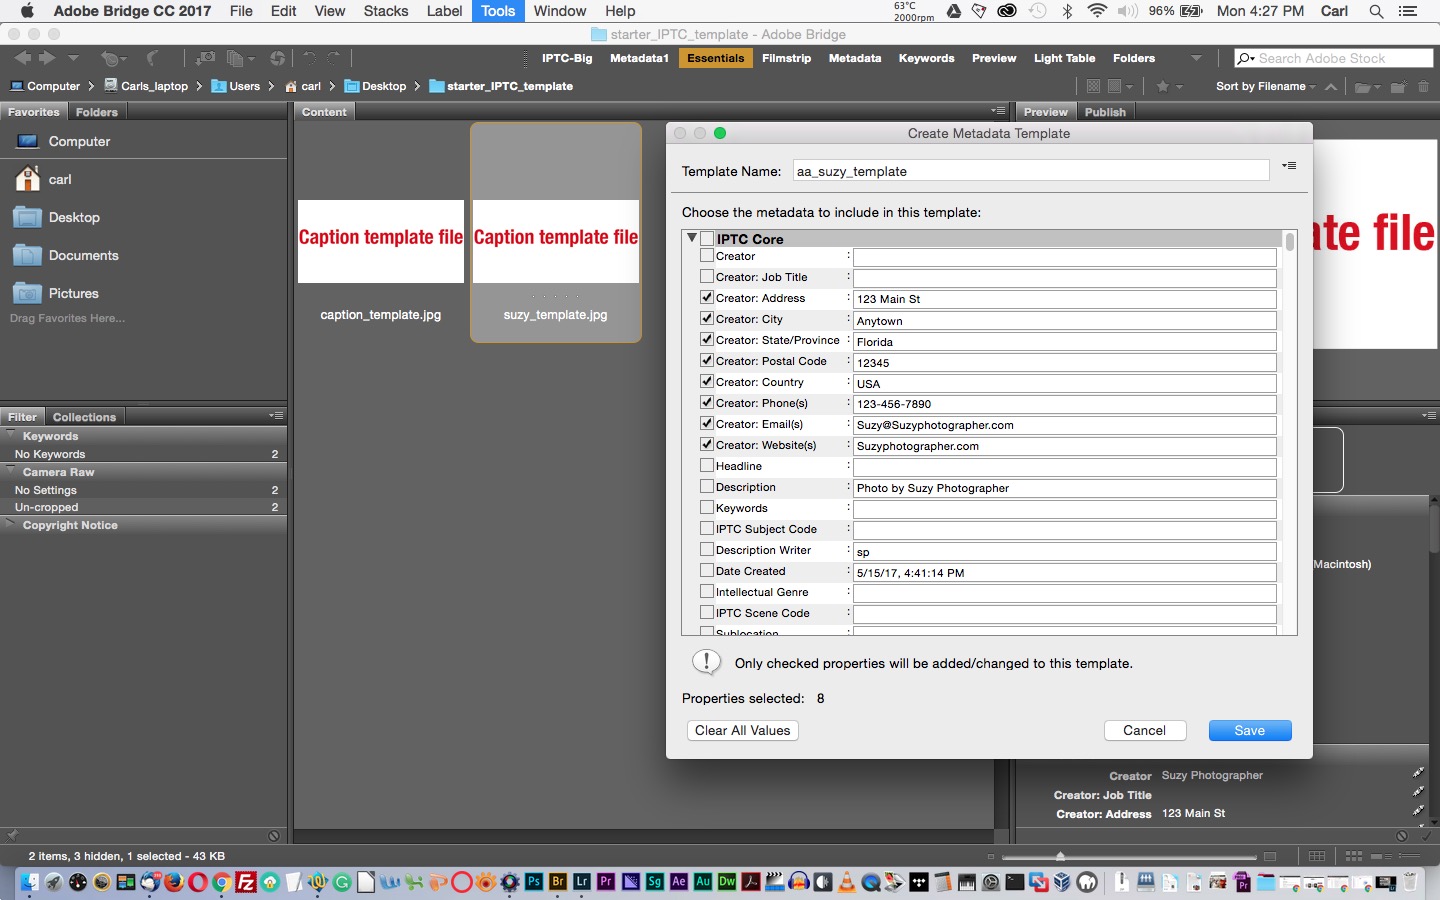
Adobe Bridge can import and export .XMP template files.
If you don’t need to edit the template you are importing, you can simply drag in the template file.
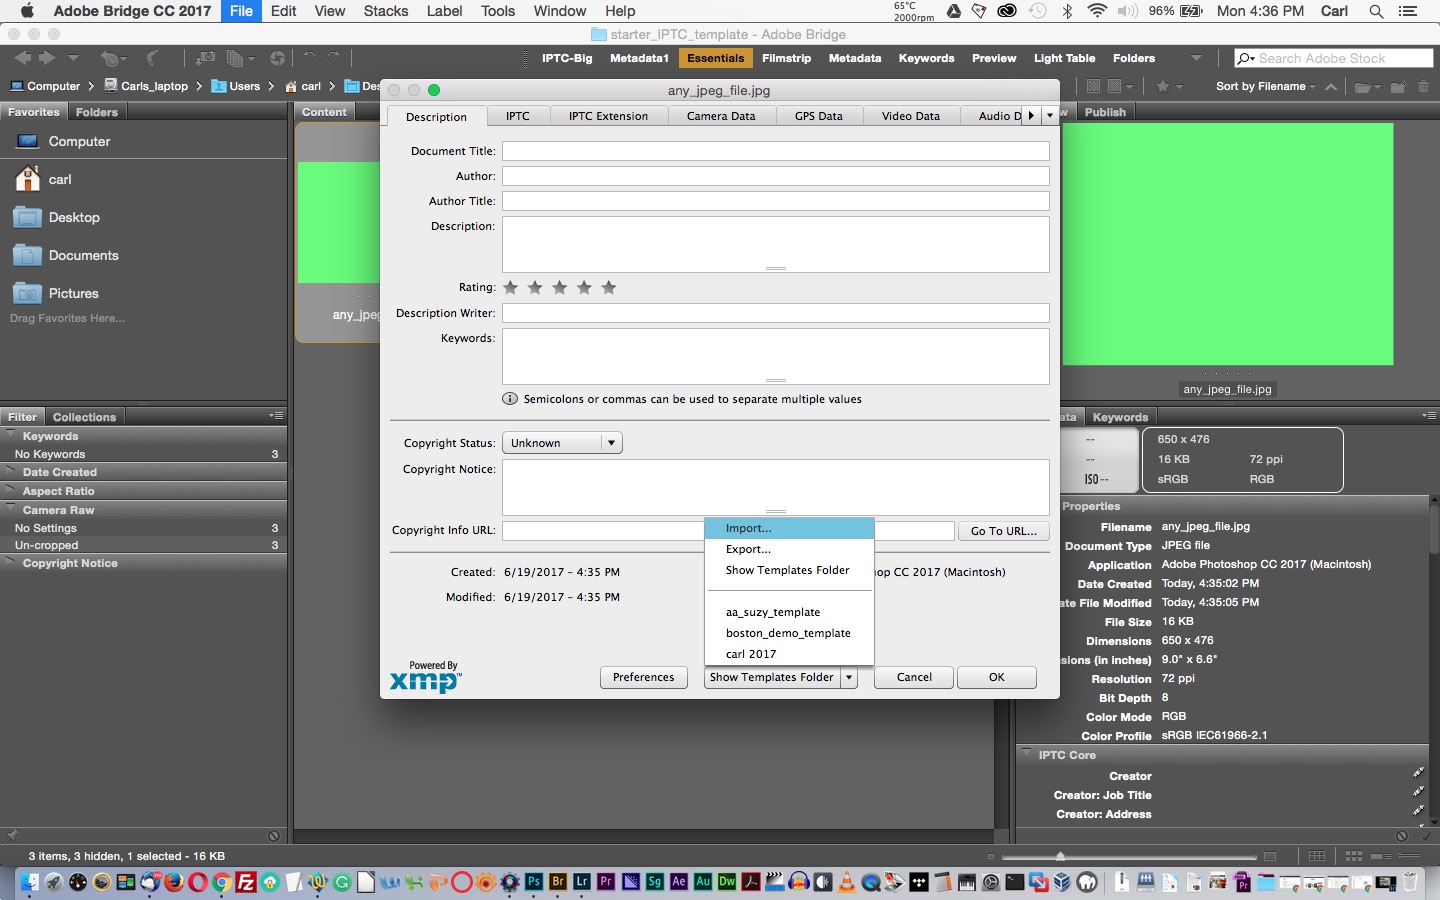
You’re done. The template will now appear in the ‘Append Metadata’ or ‘Replace Metadata’ submenus under the ‘Tools’ main menu pulldown, or in the Edit Presets dialog.
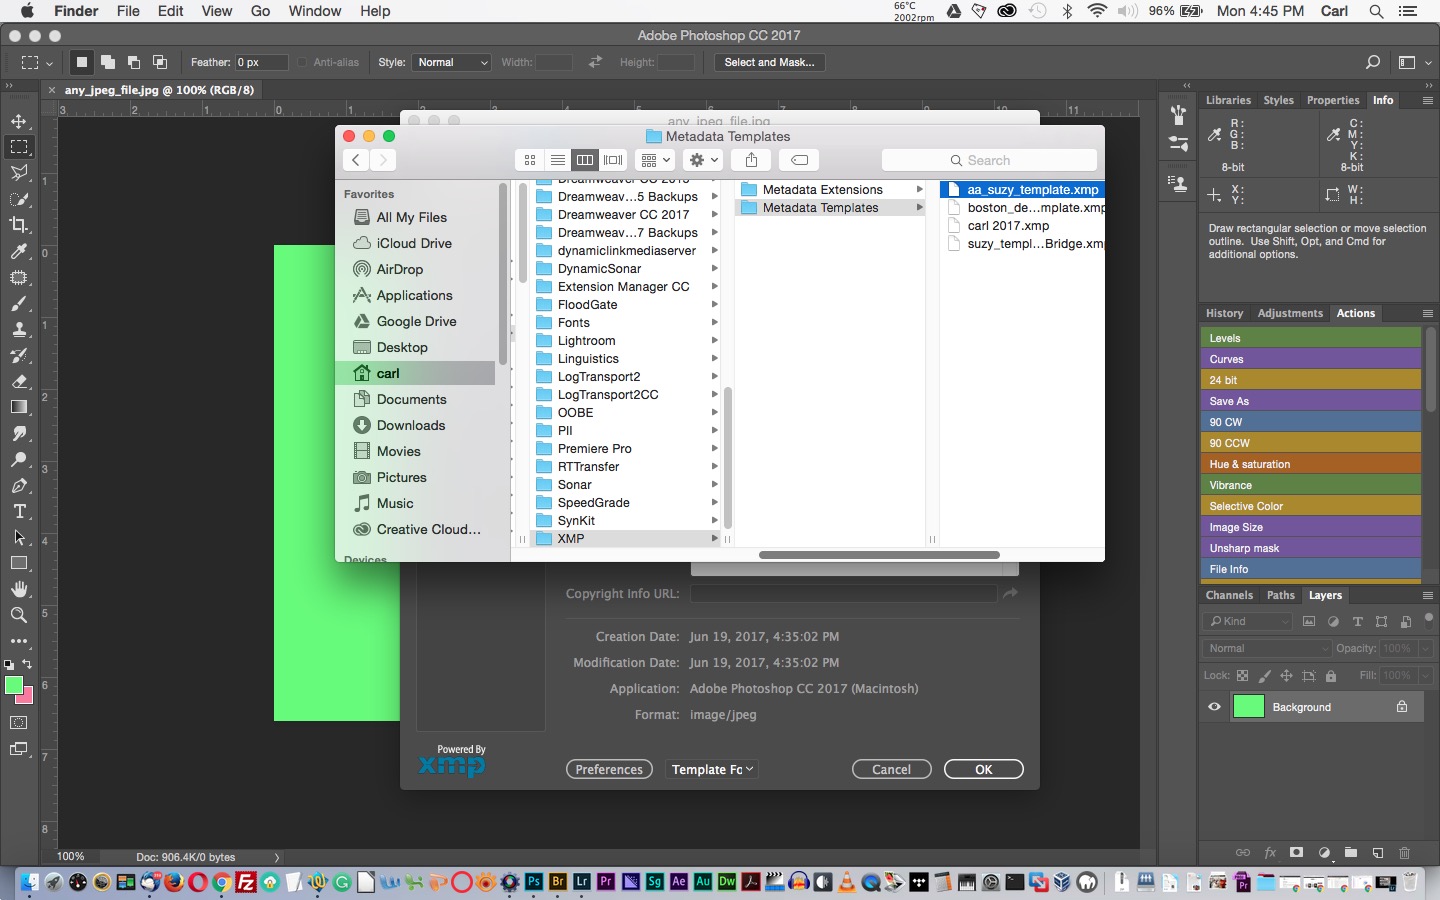
Photoshop won’t likely be your go-to metadata authoring application, but it’s handy to have your templates available in Photoshop.
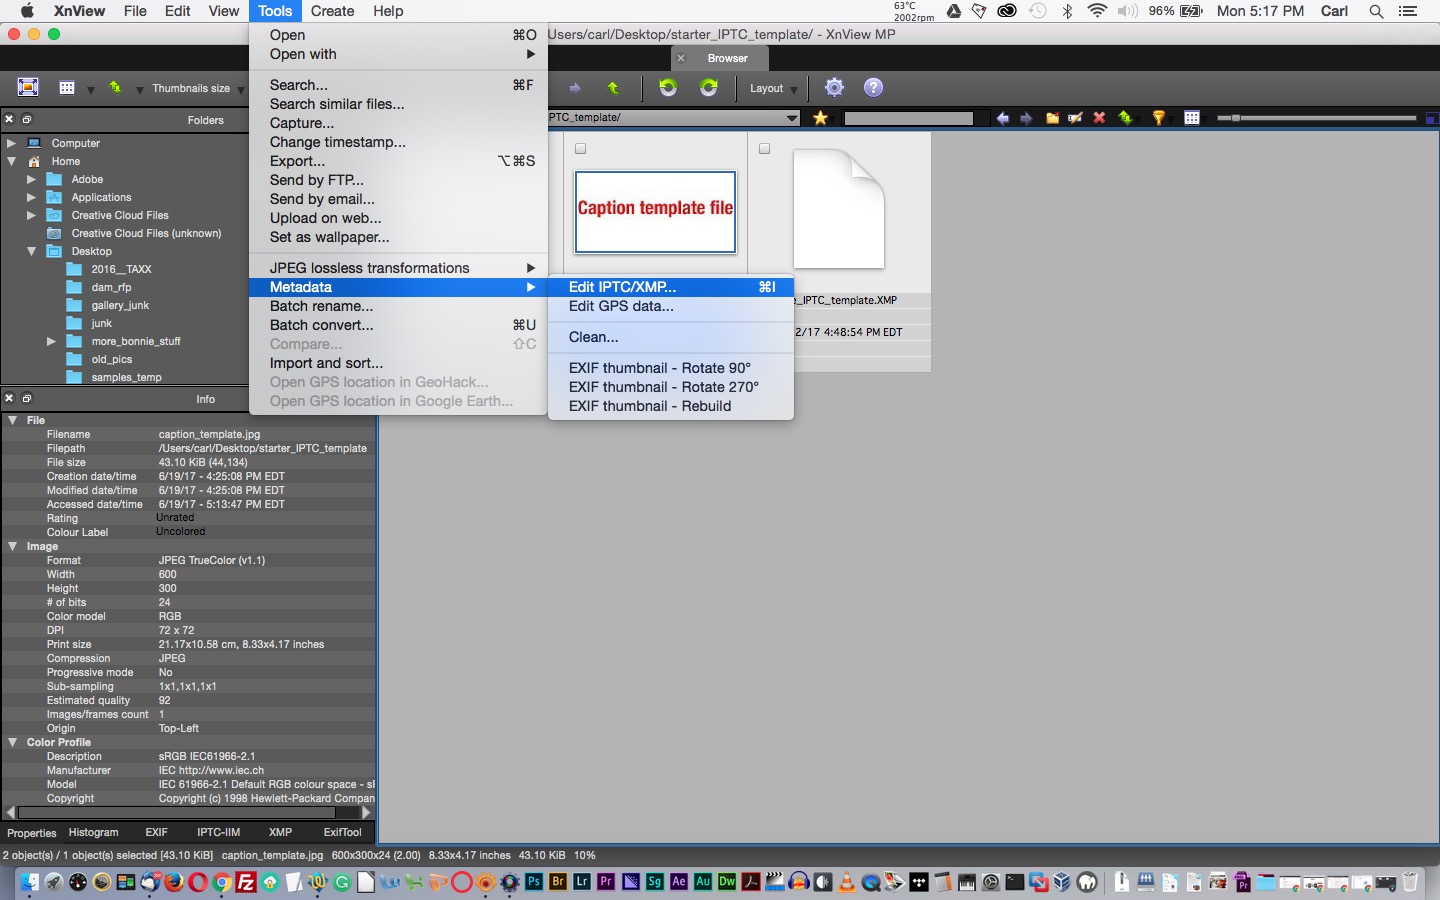
XnView is a low-cost image browser program that can edit metadata. It’s actually my favorite for removing metadata, but it does a decent job of writing it, too. (With some limitations)
Metadata aside, everybody should have a copy in XnView because it does a great job of opening mysterious or damaged image files. It can handle over 500 file types. XnView is free for personal use and costs only about €30 for commercial use.
XnView is free for personal use and costs only about €30 for commercial use.
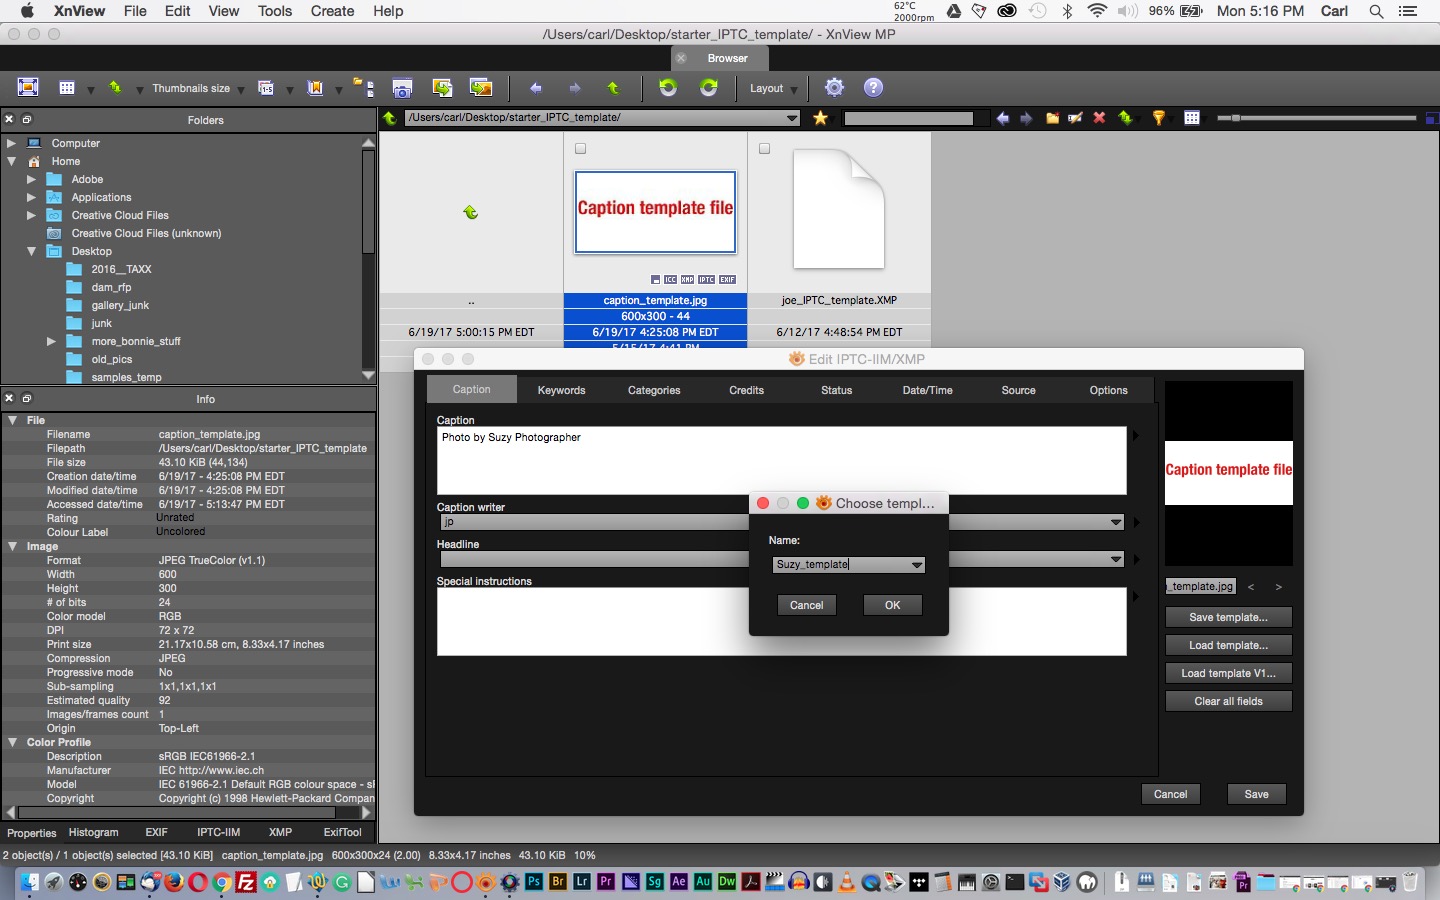
XnView cannot import and export .XMP templates. So, we’ll use a JPEG template. (And yes, if you skipped to this section, there is one in my starter kit. A download link appears close to the top of this post.)
Note that you can overwrite the name of a template in the choose template dialog. That’s a little bit dangerous, but it can also be very handy if you want to make a temporary template and change its values repeatedly. In this way, you can more or less replicate the functionality of the ‘IPTC Snapshot’ function in Photo Mechanic, or the ‘Sync’ function in Lightroom.
I mentioned that XnView can work with IPTC metadata “with some limitations”. Here’s the rub: XnView can only write core IPTC metadata.
It can’t write any of the extended IPTC fields that are stored only in the XMP data. That includes the contact fields, right fields, and Rights/Usage Information. That’s not as bad a handicap as it might seem because legacy applications can’t read the extended fields anyway.
That’s not as bad a handicap as it might seem because legacy applications can’t read the extended fields anyway.
We already plan for that and we design our metadata accordingly, not just if we are working with XnView, but always. So this isn’t a show-stopper. (As long as your contact information appears in the Copyright field, and your caption contains any information that’s really vital, you should be OK.)
XnView DOES write a copy of the core IPTC metadata in the XMP data, as expected by modern programs. And it can read the extended fields. A file written by XnView should be compatible with future programs that might not be able to read the old IPTC/IIM data, and you shouldn’t have to worry about it making files where the two instances of the IPTC data are out of sync.
Comments? Questions? Requests? Comment below.
Look for How-Tos on working with metadata in Bridge, XnView, and Photoshop right here in the coming weeks.