Switch from GD to ImageMagick and your Drupal site will no longer strip metadata
So you run a website and you read my post about the Jessica Simpson lawsuit and destruction of copyright management information. Now you’re thinking about how not destroying metadata would help, well, everybody. True enough. You can protect your contributors, reduce pollution on the web, make assets easier to manage and, just maybe, prevent a nasty lawsuit by preserving metadata (and CMI).
But how?
For Drupal and WordPress users, there’s a really simple solution: Make sure you are using ImageMagick instead of GD for your image manipulation library. Then you’re golden. Metadata (including copyright management information) that comes in on your contributors’ (or your own) images goes right out to the web, untouched.
Drupal, for those unfamiliar, is the second most popular content management platform for websites, after WordPress. Drupal is generally geared toward large enterprise sites, like eBay, or Economist.com.
WordPress users can learn about enabling ImageMagick for their CMS in this post And this one and, if your host just doesn’t offer it, there’s this one.
Switching to ImageMagick will likely be helpful in other ways, besides preserving metadata. GD is not the most loved imaging library in the whole world.
Its detractors say that it isn’t as flexible as ImageMagick, isn’t as powerful as ImageMagick, and that they achieve better image quality with ImageMagick.
Some users claim a performance advantage for one or the other libraries, but in most cases, imaging libraries are only used sporadically, when new content is published. Unless you’re running eBay and dealing with a constant firehose of new content, it’s doubtful that you’ll notice any impact on your server with either.
Watch the video version of this post
Enabling ImageMagick
So then, the switch to ImageMagick sounds like it carries more upside than downside. Stand by for the HOW-TO.
First, let’s check to be sure that we are running GD. (Other than by noticing that metadata is being stripped. That’s pretty much a giveaway.)
Go to the Admin pages of your Drupal site, and go to Configuration.
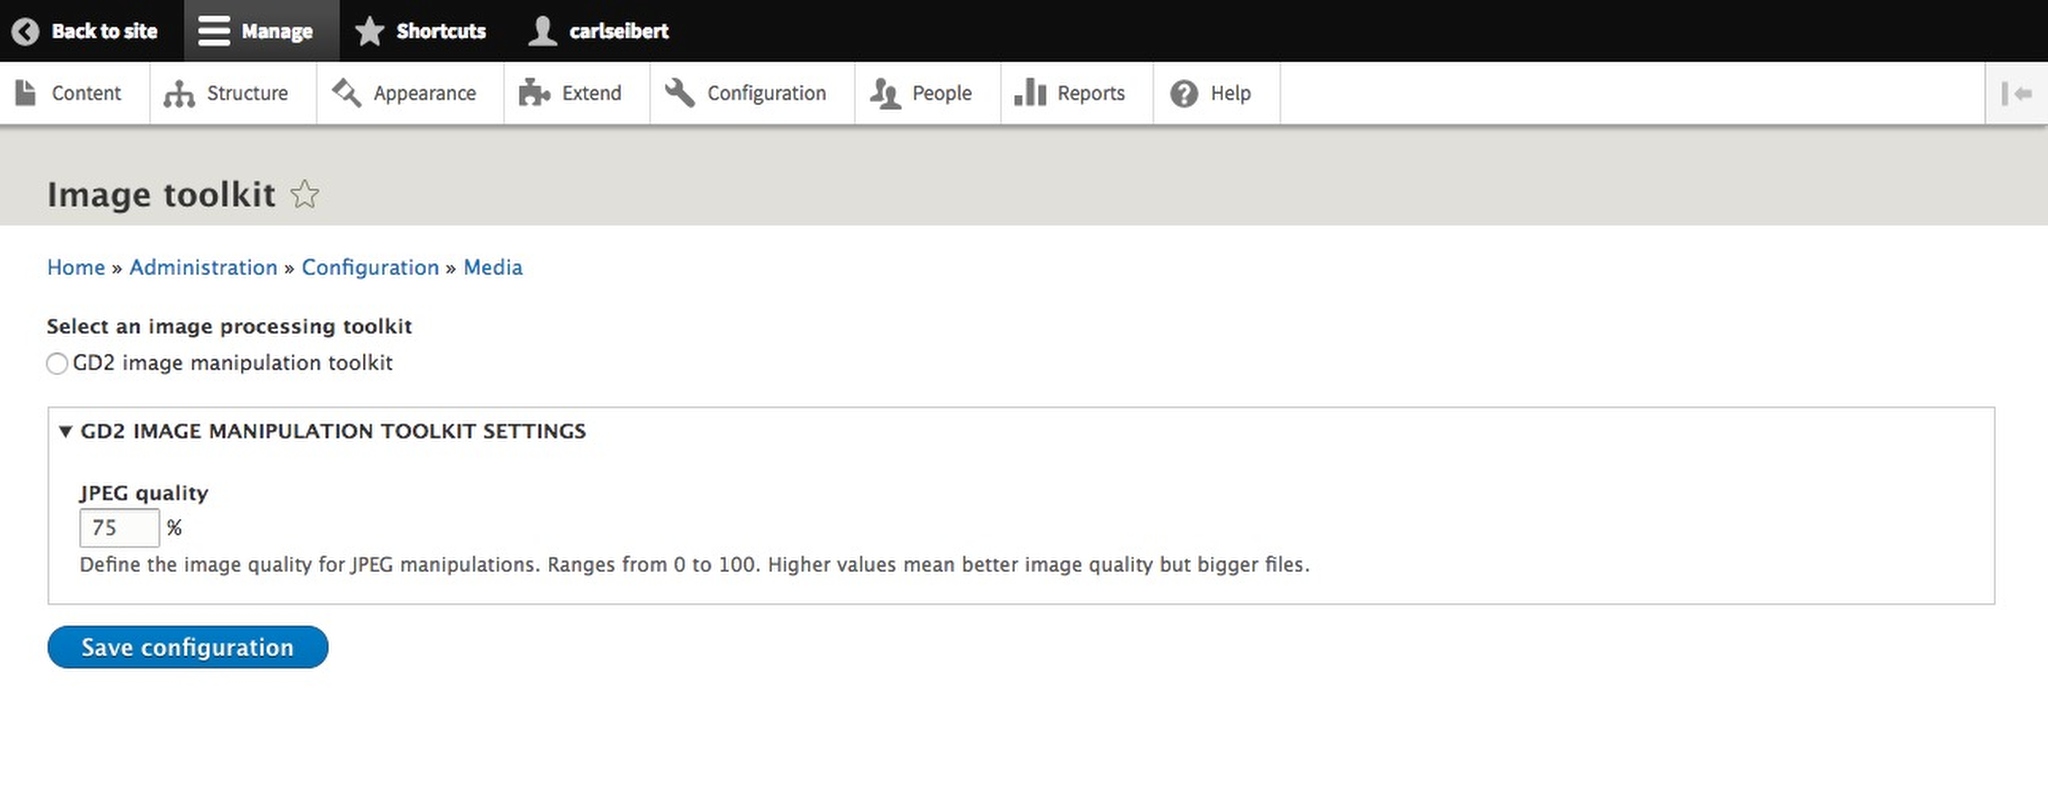
On the Configuration page, go to Image Toolkit.
On the Image Toolkit page, most likely, you will see “Select an image processing toolkit”, and only one radio button – for GD.
At this point, it’s probably a good idea to Google “Drupal-ImageMagick-your hosting provider” to see if there’s host-specific documentation for enabling Image Magick. If there is, we can proceed. If not, we need to determine if your host provides ImageMagick on its servers for your class of service. Most reputable Drupal hosts will. If Google fails to return an answer, a call to customer service might be necessary.
My experience
My test Drupal instance lives in a sandbox at Pantheon. Pantheon’s ImageMagick documentation is here.
On my test Drupal 8 system, all that was involved was adding a module or two and turning it/them on.
The module that enables ImageMagick is https://www.drupal.org/project/imagemagick There are Drupal 8 and Drupal 7 versions available. (There is a note on the page that says that the module, by default, will provide “feature parity” with GD. Don’t worry. “Feature parity” apparently doesn’t include configuring ImageMagick to imitate GD’s gall darn awful metadata behavior.)
An error
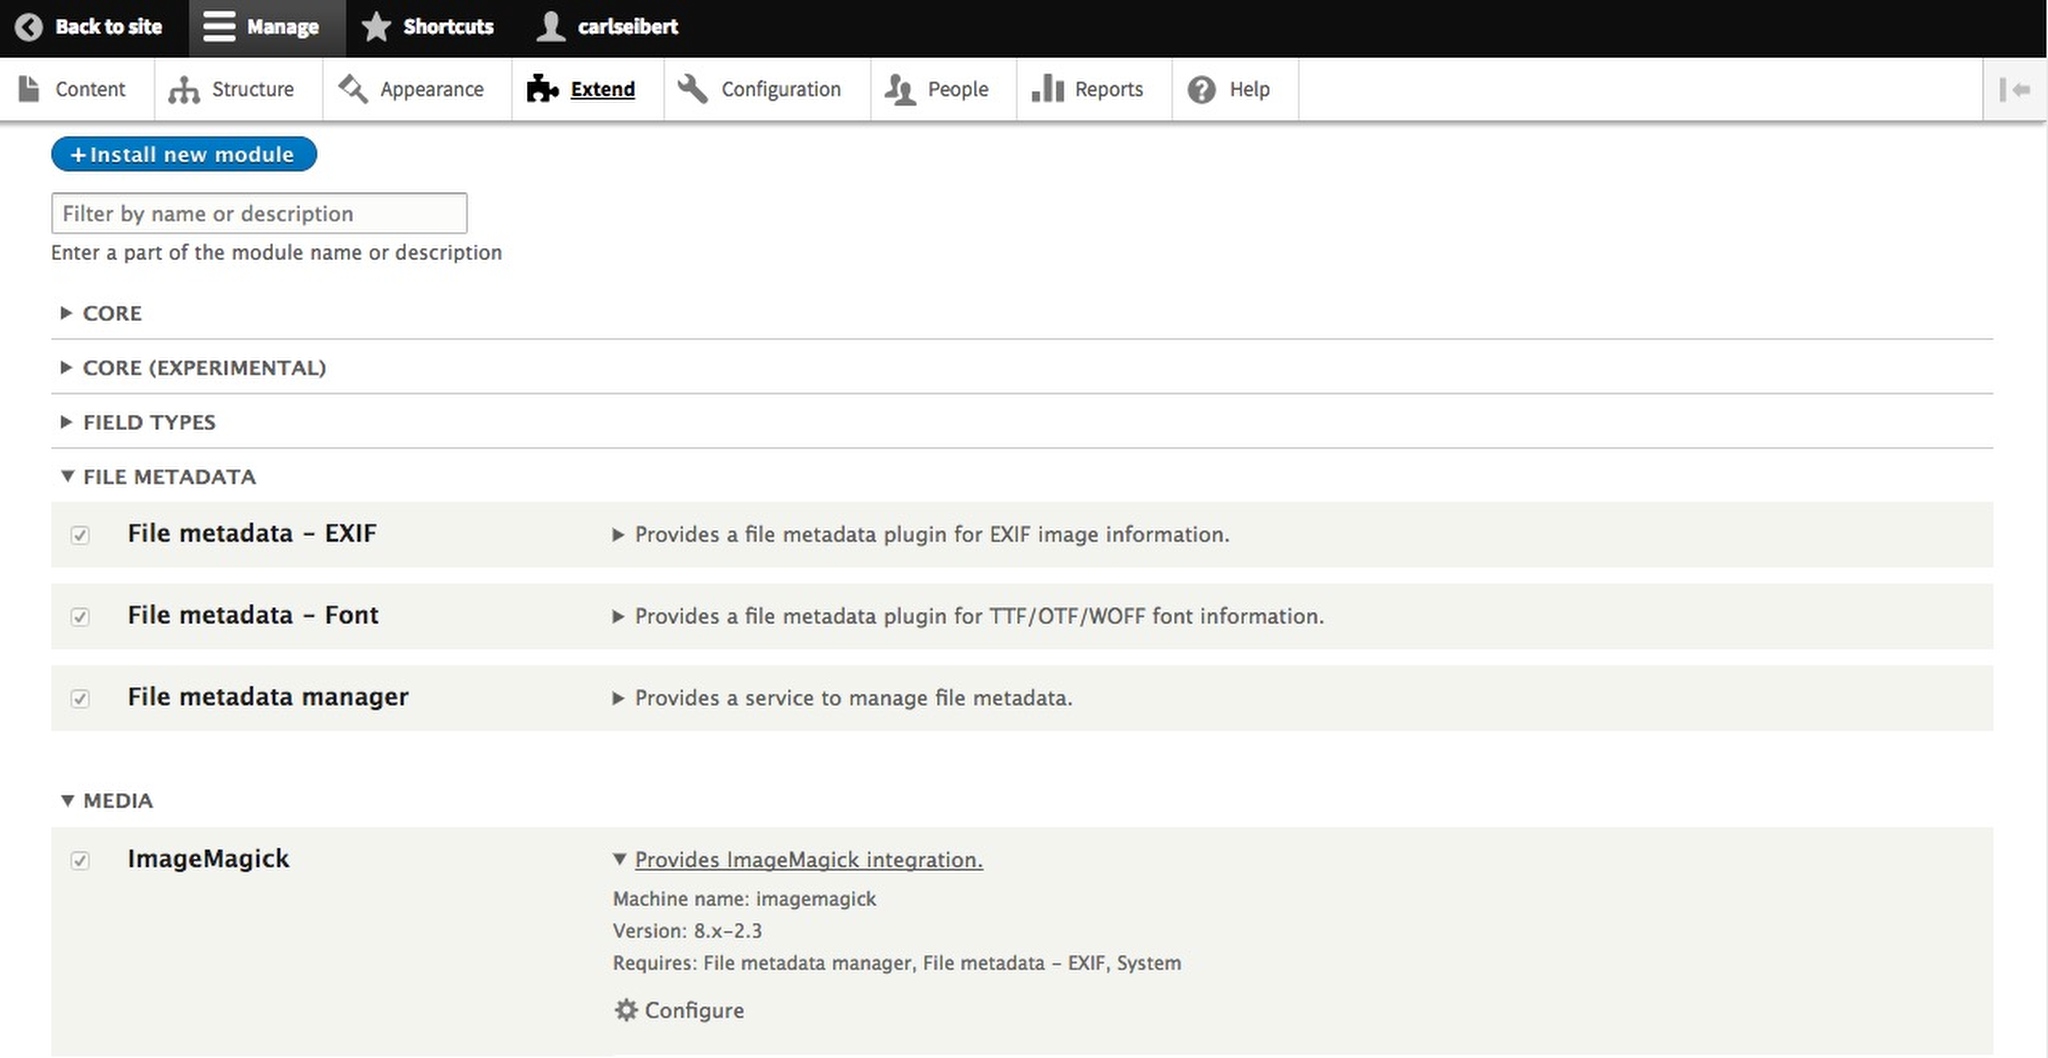
I installed the module and it complained of an unmet dependency: “Requires: File_mdm (missing)File_mdm_exif (missing)System”.
Oh dear. If I was a seasoned Drupal guy, I would probably have been able to decipher that all that was being asked of me was to add another module (and which one). But since I’m… me, a chat with Customer Service ensued. The rep with whom I chatted didn’t know the answer, so I shelved the project for about 5 hours until an email from Pantheon arrived with the straight scoop.
(At this point, a shout out to Pantheon for their excellent service is in order. First off, it’s incredibly nice of them to provide free sandbox space to basically anybody. Then, for them to give excellent support to some guy in a free sandbox is simply outstanding.)
Easy solution
As per my email from customer service, I grabbed https://www.drupal.org/project/File_mdm , which actually includes both of the dependencies. I installed it and activated both it and the ImageMagick module and things were good.
You may find that you need to specify the path to the ImageMagick executable. I didn’t this time, but you might. Typically, on Linux/Unix systems, it’s /usr/bin/convert. “Convert” being the executable. It might be somewhere else on your server, of course. But on the ones that I’ve dealt with, /usr/bin is where it’s been.
Back to the plot
Once ImageMagick is up and available, go to Configuration > Image Toolkit, and you should now see two radio buttons, one for ImageMagick and one for GD. Choose ImageMagick. Now, you’ll see a section for ImageMagick settings. The defaults were fine for me. Check to make sure that ImageMagick rather than GraphicsMagick is selected.
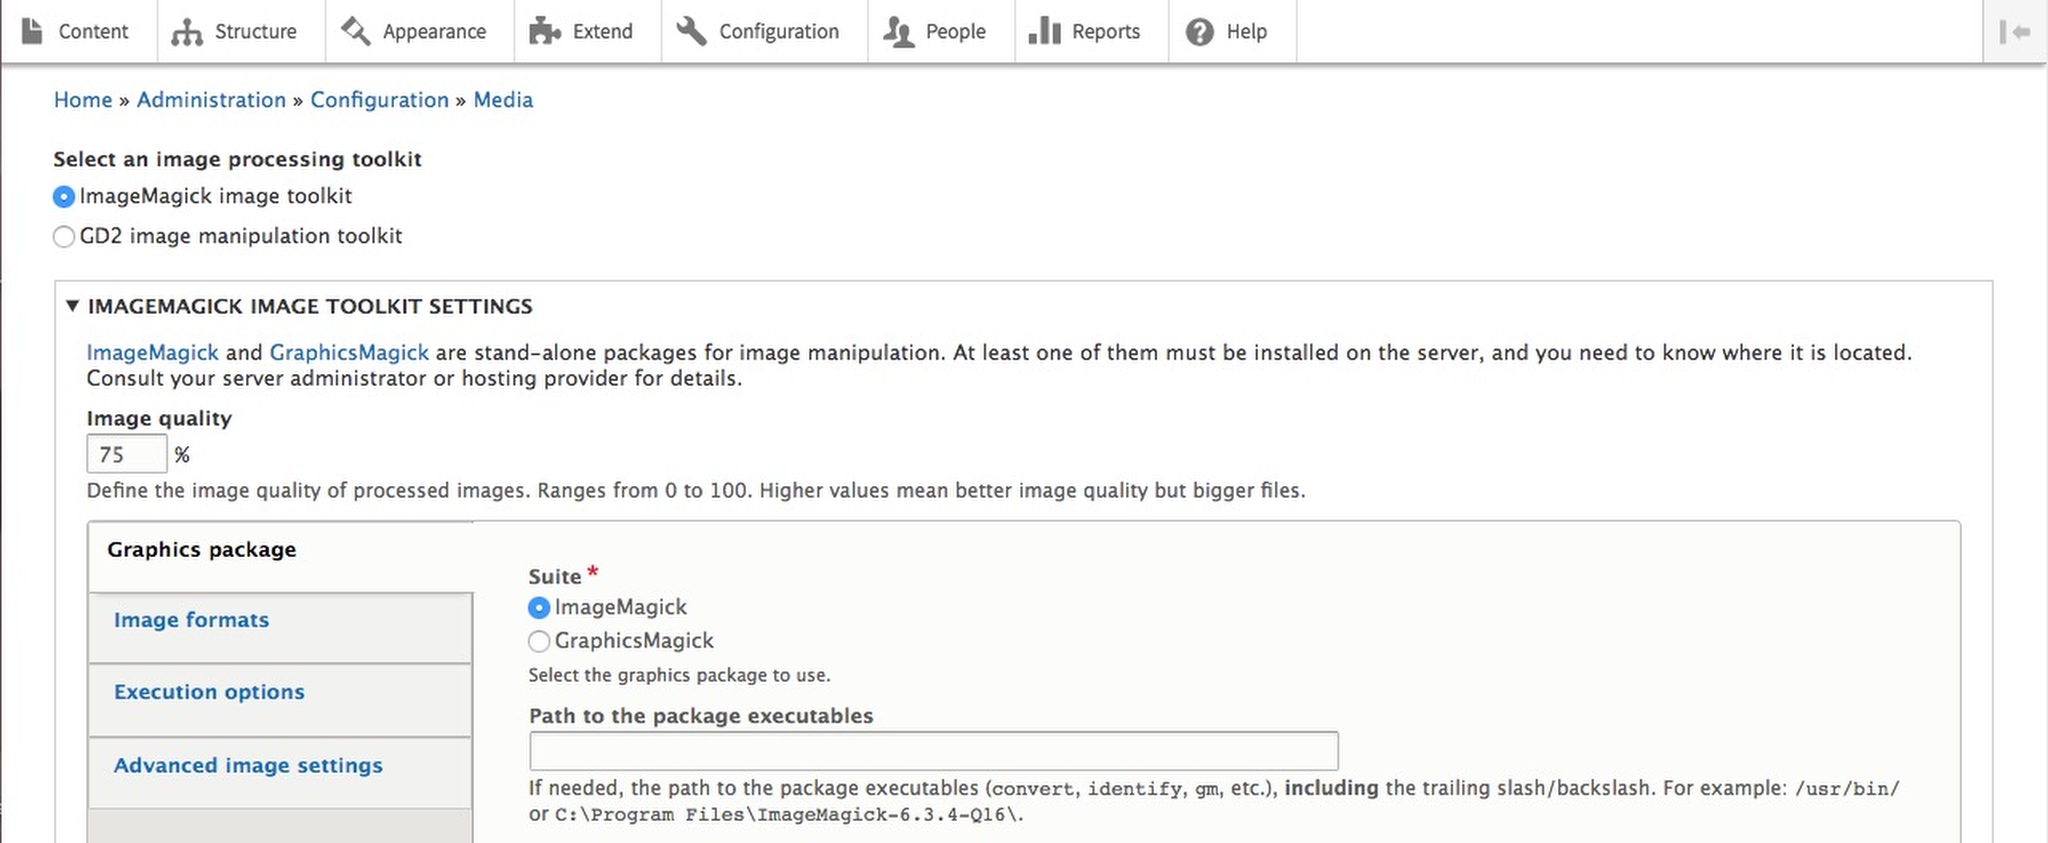
Save your configuration.
Now it’s time to test and see what we’ve accomplished.
Testing, testing…
From the backend of your Drupal site, create a content item that includes a picture.
Choose and upload a photo that has metadata and is bigger than a finished picture on your article or post. (Pictures already on your site were processed – and stripped – by GD. They won’t tell us anything.)

Save.
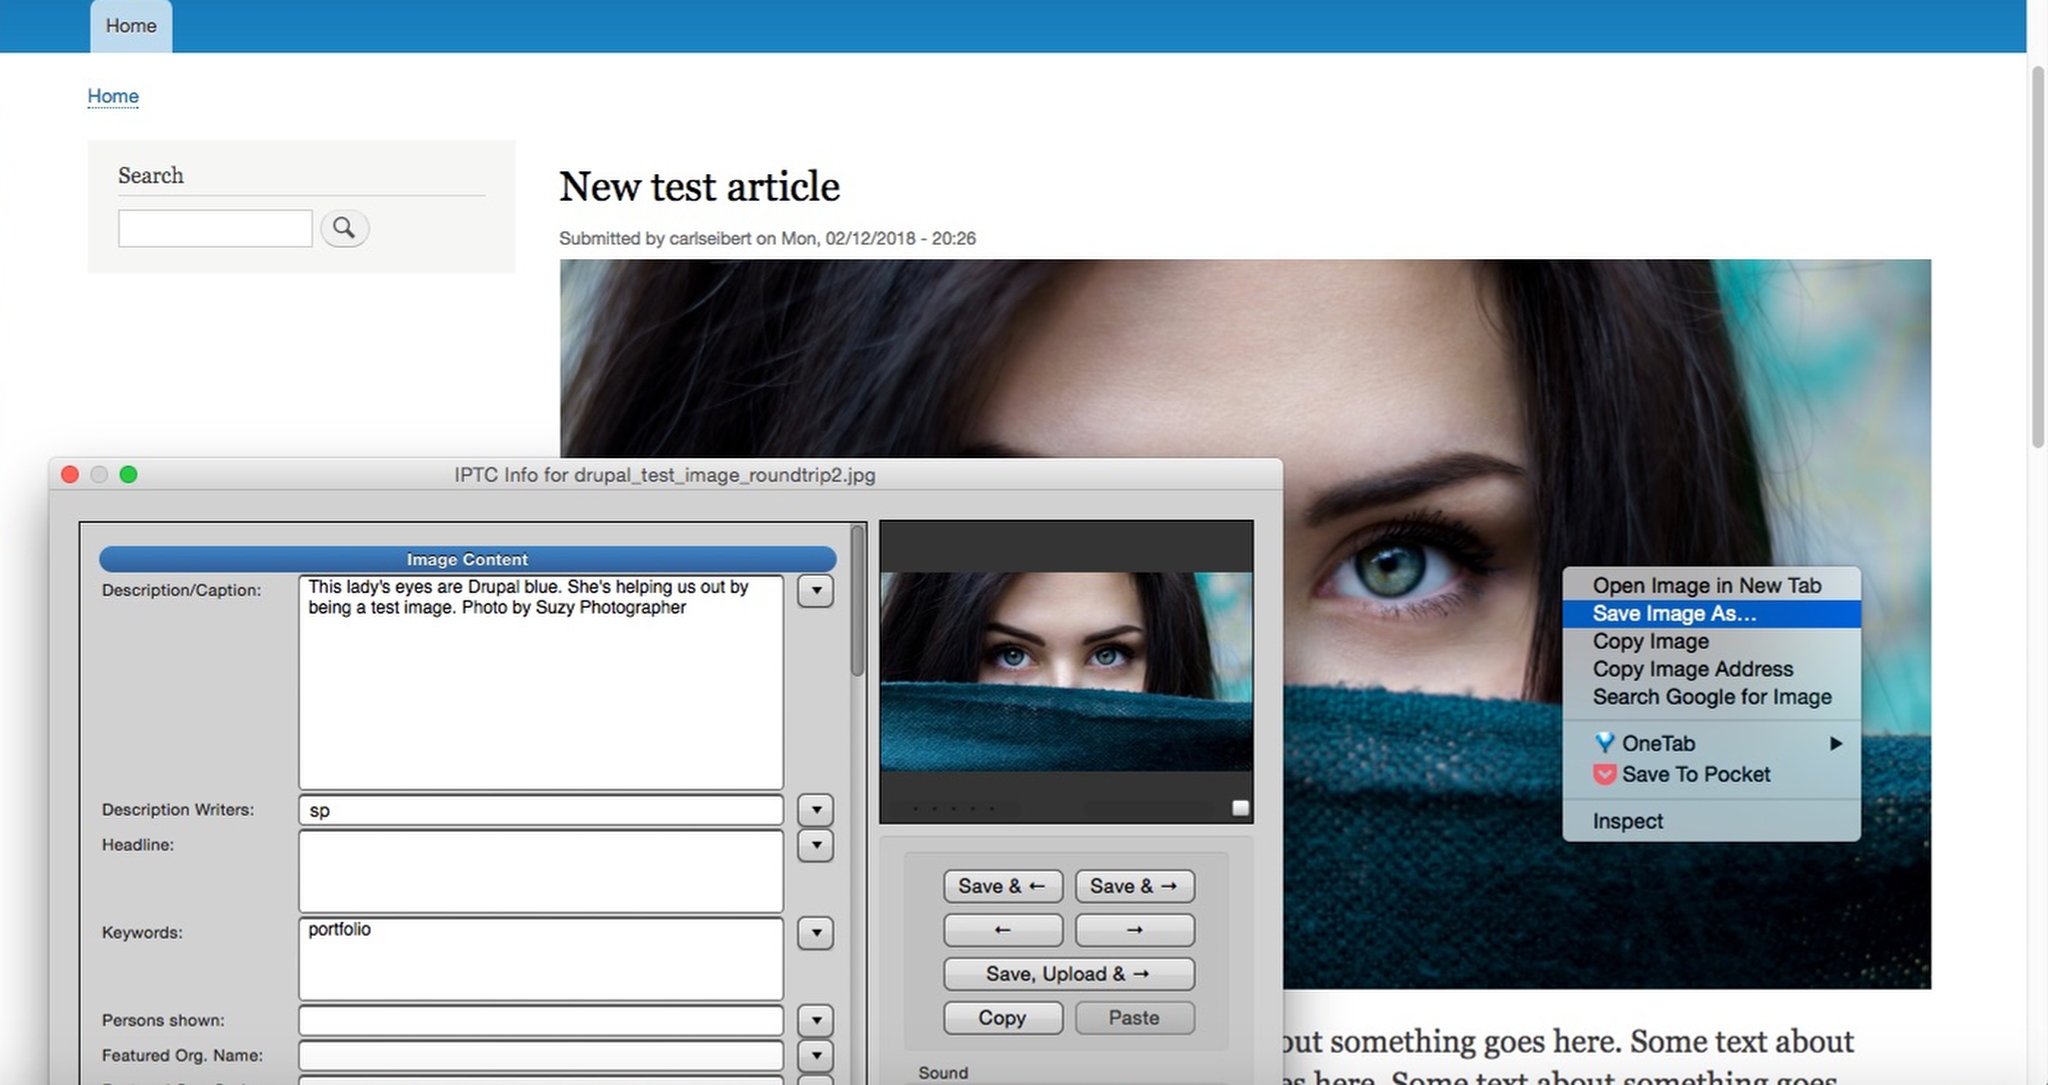
Now view your content item and right-click on the picture and download it.
Once you have the copy of the picture from your site back on your desktop, check to make sure that it indeed has metadata as it did originally. Check its size. It should be smaller than the original. (That confirms that ImageMagick did indeed make a rendition of the image. If we were looking at the full-size original, that wouldn’t tell us anything.)
Everything should be awesome
If the metadata is there, as it should be, you’re in business. The metadata (including CMI) that you or your contributors put on your images will be safely embedded in your image files. If the pictures find themselves somewhere other than attached to your pages, they can phone home. Or the caring stranger who finds them can call for them.
If you are worried that the metadata will make your images heavy and slow down your page load time, don’t be. At today’s average download speeds, a full set of metadata will add an imperceptible amount to the time it takes to serve a picture – less than a couple of milliseconds, usually. (Down a bit from even six months ago.)
Several posts on this blog mention the impact – or lack thereof – of metadata on page load times. Try this one. And stay tuned for my upcoming in-depth look at optimizing images for the web.
Had I known ahead of time about the additional module, this whole operation, including testing, would have taken less time than reading this post. As it was, it wasn’t exactly strenuous.
Have you upgraded to ImageMagick? Did doing so make you feel better? Do your contributors express heartfelt gratitude? Does your dog appreciate you more? Jump in the comments and let us know.